
by Steve Sorbo | May 1, 2018 | Uncategorized
Backing up your Mac is like flossing your teeth: everyone knows they should do it every night, but too many people never get around to it. Unlike flossing, once you set up backups, they don’t require daily attention. And turning on Apple’s Time Machine backup feature is easy—simply open System Preferences > Time Machine, click Select Backup Disk, and pick a hard drive to hold your backups.
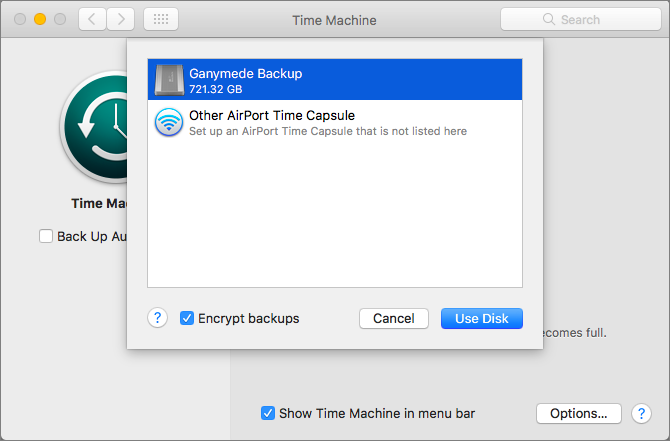
Ah, but there’s the rub. If you don’t have an appropriate hard drive, you need to get one, and there are tons of options. Here’s our rundown of what to look for, with recommendations.
How Much Space Do You Need?
The first question when looking for a backup drive is how much data it needs to hold. You could put a lot of effort into figuring this out, but for most people, the answer simple. Buy the largest drive you can reasonably afford, as long as it will hold at least two to three times as much data as you have or anticipate creating in the near future.
Say you use a MacBook Pro with a 512 GB SSD. You could get by with a 1 TB backup drive, which would be twice as large as your internal drive. But if a 1 TB drive costs $100 and a 2 TB drive costs $130, it’s worth the extra $30 to double the available space.
How Will You Connect It to Your Mac?
With external hard drives, you need to match the ports on your Mac with the ports on the drive. That might sound tricky, what with USB 3, FireWire, USB-C, and Thunderbolt. Luckily, for most people, the right choice is simple: a drive that supports USB 3. They’re inexpensive and plenty fast for backups.
Nearly every Mac sold since 2012 supports USB 3, either via the familiar USB-A port or the newer USB-C/Thunderbolt 3 port. If your Mac has only USB-C ports—as would be the case if you have either a MacBook or a recent MacBook Pro—you may also need an adapter cable that’s USB-A on one end and USB-C on the other.
What Type of Drive Should You Buy?
Inside the case, an external hard drive contains either a 2.5-inch or 3.5-inch drive mechanism.
- 2.5-inch drives are smaller, more portable, and usually bus-powered, meaning they get power from your computer instead of from a wall outlet, which makes them easier to hook up and use. They’re also designed to be more rugged. On the downside, they cost more per gigabyte, max out at 5 TB in size, and are often slower.
- 3.5-inch drives usually need to be plugged into power, and they’re less appropriate to carry around. However, they cost less per gigabyte and can be bought easily in sizes up to 8 TB. Plus, they tend to support more connection types, making them more flexible.
If you work mostly on a notebook Mac and lead a mobile lifestyle, carrying a bus-powered 2.5-inch drive ensures you can back up while traveling. Such a drive might also be best for a MacBook-equipped college student. However, if your Mac mostly sits on a desk or you bring your laptop back to the same place every night, you’ll likely be better served by a 3.5-inch drive—they’re faster, cheaper, and store more data.
Putting It All Together
Since the hard drive mechanisms are made by a relatively small number companies, the differences between external drives mostly come down to the price, industrial design, and extra ports. We’ve generally had good luck with drives from Other World Computing, LaCie, Seagate, and Western Digital. Feel free to ask us for specific recommendations for your setup.
Social Media: When it comes to losing data, the question is when it will happen, not if it will happen. Everyone loses data eventually. Smart people have backups. Here’s how to pick the right backup drive for your needs.

by Steve Sorbo | May 1, 2018 | Uncategorized
Don’t get us wrong—email is great. But sometimes there’s too much of it at work, as colleagues share information too broadly or chime in unnecessarily, and as marketing offers and other junk fills your inbox. Over the past few years, lots of organizations—including small and large firms, non-profits, academic departments, student project teams, and government agencies—have moved their internal communications to the group messaging service Slack, which is free but includes paid plans with additional features. It’s also possible to make public groups that anyone can join.
Slack, which has apps for macOS, iOS (iPhone and iPad), Windows, and Android, isn’t conceptually all that different from Apple’s Messages app. You type short messages and other people in the conversation can reply. You can share graphics or other files in the discussion, and search through past messages. Slack supports person-to-person voice calls, and if you switch from a free to a paid team, group calls, video conferencing, and screen sharing.
What sets Slack apart from simple messaging apps is that it lets you segment discussions into “channels,” which can either be public, such that everyone in the team can see them, or private, so only invitees can participate. Plus, you can have “direct message” conversations with individuals or small groups.
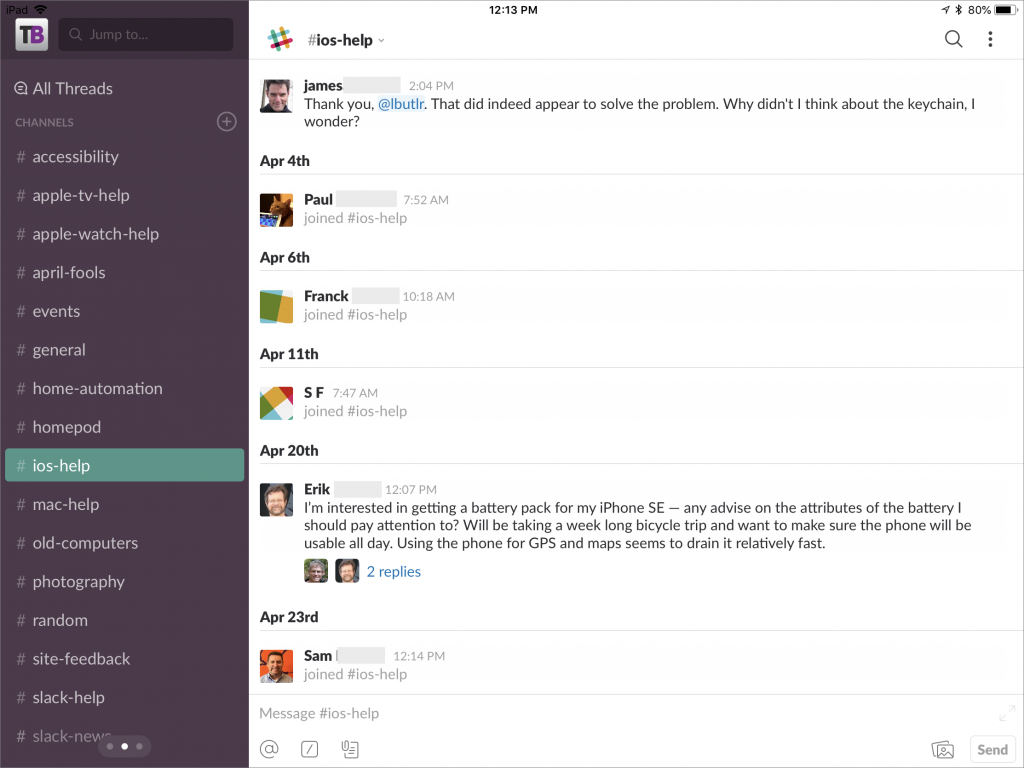
The beauty of Slack channels is that they’re easy to create and they bring together all communications relevant to a particular workgroup, project, or topic. You might have a private #marketing channel for everyone in that department, a private #annual-report channel for the people who need to put together that document, and a public #facilities channel to talk about burnt-out lightbulbs and stuck doors. That’s way better than organization-wide mailing lists, since you can pay attention to just those channels that matter to you, and ignore the others.
How do you keep up on discussions? Slack has flexible notifications, letting you choose at the top level to be notified about everything; just direct messages, mentions, and keywords; or nothing. You can also choose to be notified of replies to threads you’re in. Then you can override those defaults for any channel or conversation you’re in, which lets you make sure that important messages get through and water cooler chatter doesn’t interrupt you. Plus, if you leave your computer, Slack can repoint notifications to your mobile devices automatically, with separate settings to make sure you aren’t overly nagged while at your kid’s soccer game.
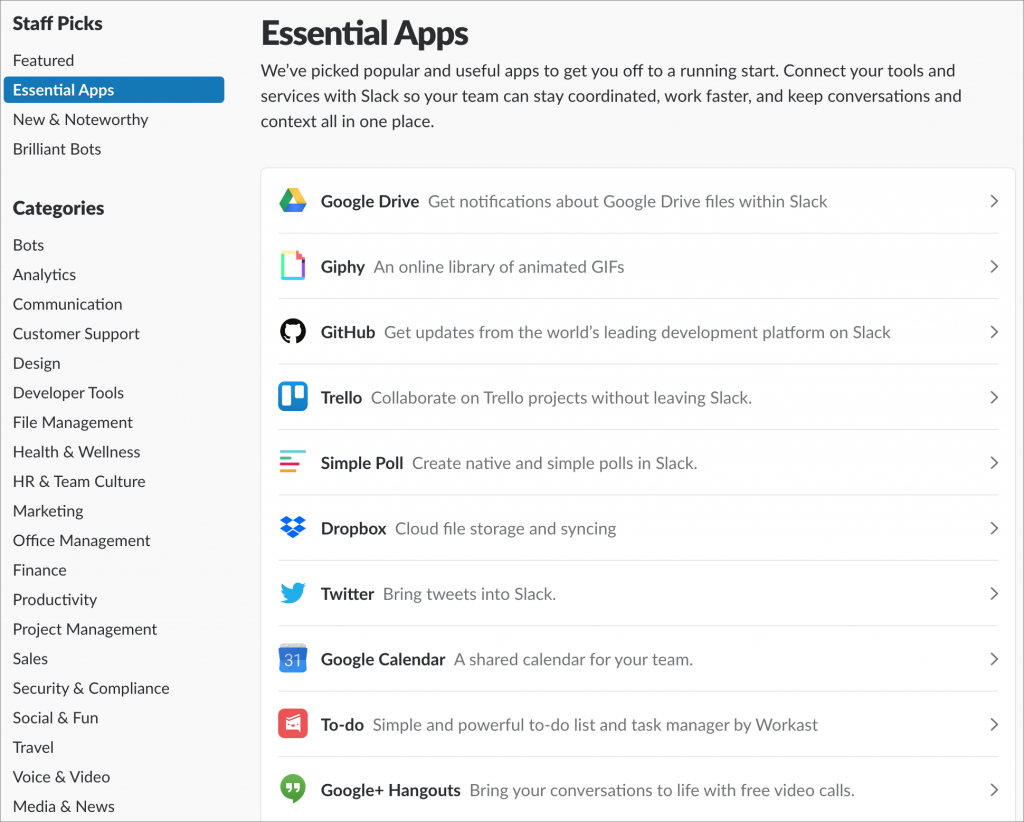
Slack provides tons of other features that can prove useful in organizations of any size. You can share and comment on files of any type, which is far more effective than sending attachments around in email. You can create “posts” and get others to edit them collaboratively—a boon when trying to craft the perfect bit of text for some purpose. And you can integrate hundreds of Internet services into Slack so it can act as a single dashboard for many other apps.
There’s no question that setting up Slack for your team is a major step, but the fact that it has become so popular—77% of Fortune 100 companies use it—shows that it can make your organization’s internal communications faster, more targeted, and more effective. It’s not hard to set up and maintain, but give us a call to talk about the best ways to begin.
Social Media: Is email overwhelming your organization? Look to Slack to make your internal communications, faster, more transparent, and more efficient. Here’s the scoop.

by Steve Sorbo | May 1, 2018 | Uncategorized
One of the great innovations of the Mac, way back when, was the concept of the Trash. Instead of deleting files immediately, you’d put them in the Trash, where they’d sit until you either took them out or removed them for good by emptying the Trash. You undoubtedly know the basics of working with the Trash: drag files in, drag mistakenly trashed files out, and choose Finder > Empty Trash to delete the files and recover the disk space.
But instead of just dragging files to and from the Trash, you can take advantage of a few special techniques that make working with the Trash faster and easier.
Move Files to the Trash
The most obvious method of trashing a file is to drop it on the Trash icon in the Dock, but on a large screen that can be fussy. Once you’ve selected one or more files in the Finder, try one of these alternatives:
- Press Command-Delete. This is our favorite!
- Control- or right-click on one of them, and choose Move to Trash.
- Choose File > Move to Trash.
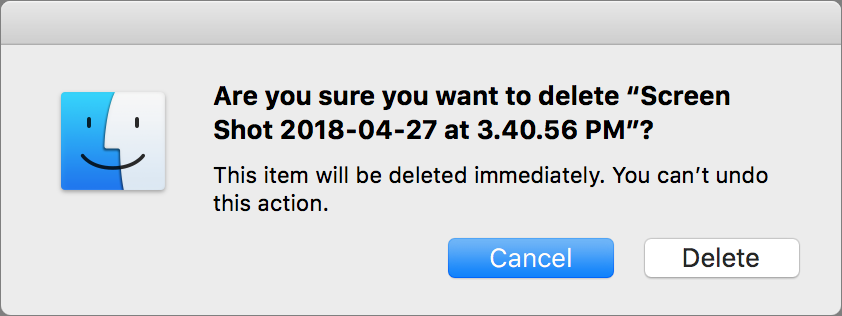
What if you want to live dangerously and delete a file immediately, perhaps because you need to recover the disk space right away? Hold down Option and choose File > Delete Immediately, or press Command-Option-Delete. The Finder always asks whether you want to do this.
Remove Files from the Trash
We all make mistakes and trash files by accident, or sometimes realize later that a file we put in the Trash is still needed. Taking something out is easy: click the Trash icon on the Dock to open its window, and then drag the file out of the window. But, there is more to know about the best ways to remove files from the Trash.
First, if you trash a file and immediately realize it was the wrong thing to do, press Command-Z or choose Edit > Undo Move to Trash to put it back where it started
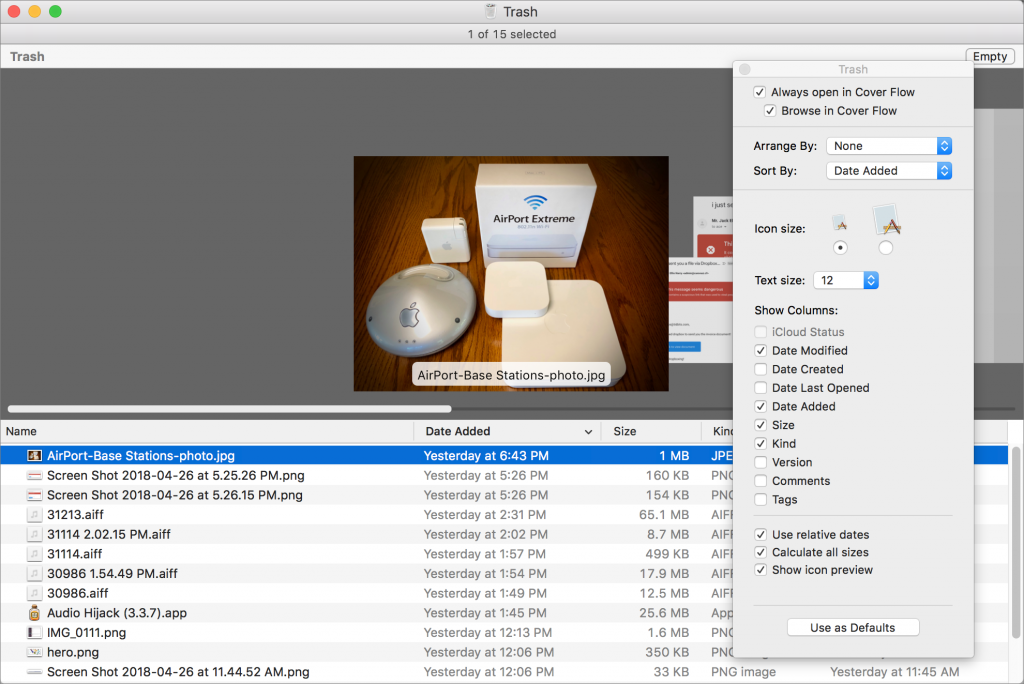
We like viewing the Trash window in Cover Flow view (open it, and then choose View > as Cover Flow) because of the document preview at the top of the window. We also like to sort by Date Added so that we can see the items we’ve trashed most recently (if the Date Added column isn’t showing, choose View > Show View Options and select the Date Added checkbox).
In the Trash window, you can select an item and use the Put Back command to return it to its original location. Try one of these techniques:
- Press Command-Delete. It’s the same shortcut as for Move to Trash, but does the reverse when the selection is in the Trash window.
- Control- or right-click on one of them, and choose Put Back.
- Choose File > Put Back.
Empty the Trash
The main reason to empty the Trash is if you need to reclaim the disk space its contents occupy. You can do that at any time, as we’ll explain momentarily, but in macOS 10.12 Sierra and later, you can have the Mac automatically remove items from the Trash after they’ve been in there for 30 days. Just choose Finder > Preferences > Advanced, and select the “Remove items from the Trash after 30 days” checkbox.
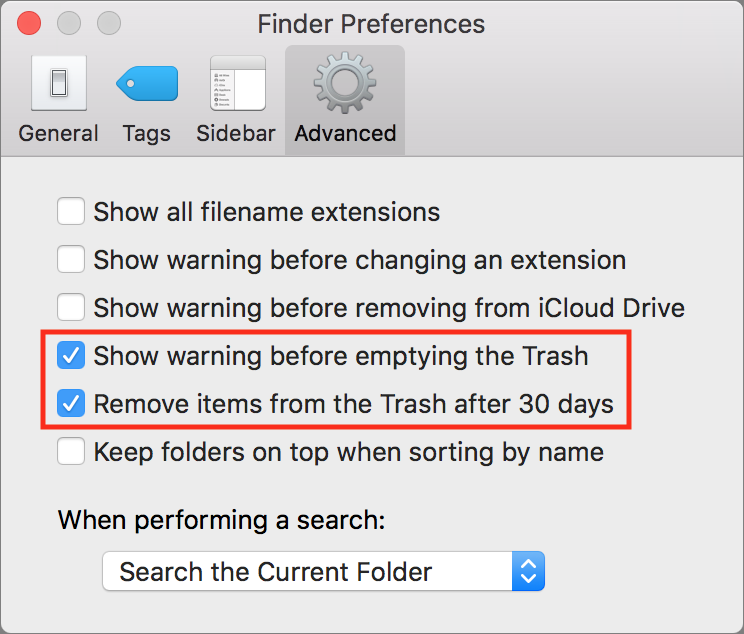
To empty the Trash manually, choose Finder > Empty Trash. If “Show warning before emptying the Trash” is selected in the window shown above, you’ll be prompted to confirm the deletion. If you don’t like the prompt, deselect that checkbox. Other shortcuts include:
- Click and hold the Trash icon on the Dock, and choose Empty Trash.
- Press Command-Shift-Delete.
- To avoid the warning even when it’s enabled, press Command-Shift-Option-Delete.
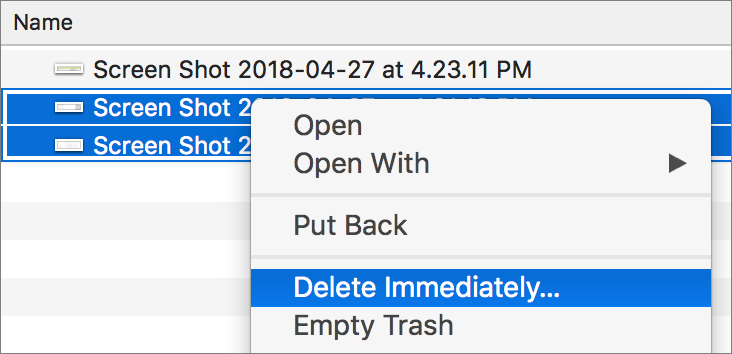
Emptying the Trash doesn’t have to be an all or nothing action. Imagine that you’ve just trashed a few huge files and want to recover their disk space without tossing every other file in the Trash. Just select them, Control- or right-click one, and choose Delete Immediately. You can also press Command-Option-Delete.
Files in your Mac’s Trash smell better than the inside of a typical garbage can, but that doesn’t mean you want to spend a lot of time fussing with them. With these tips, you can trash files, recover from mistakes, and clear disk space quickly and confidently.
Social Media: Did you know you can easily restore trashed Mac files to their original location? For that and other Trash-related tips and techniques, check out our post.
Recent Comments