by Steve Sorbo | Feb 3, 2020 | Uncategorized
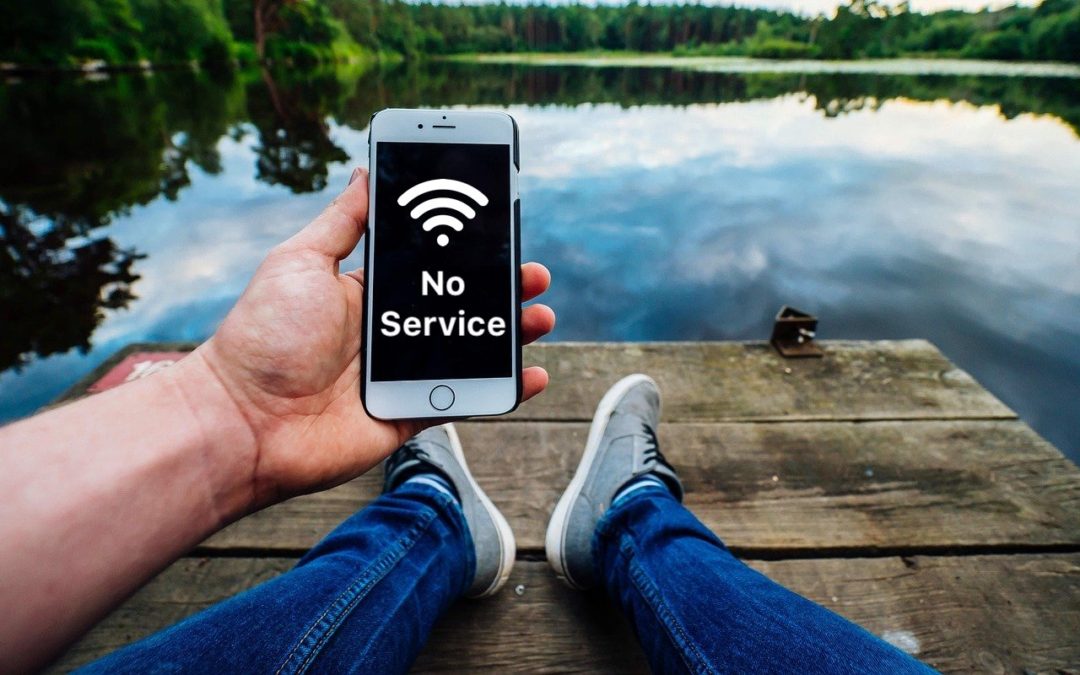
Have you ever seen the dreaded “No Service” label at the top of your iPhone’s screen, even when you’re pretty sure there should be cellular reception? It’s not common, but the iPhone’s cellular radio can occasionally get confused. Luckily, you can easily fix the problem. Open Control Center (swipe down from the upper-right corner on an iPhone X or later or an iPad; or up from the bottom on an earlier iPhone) and tap the airplane icon to put the iPhone in airplane mode. That turns off the cellular radio. Wait a few seconds and tap the airplane icon again to re-enable the cellular radio. If that doesn’t work, power-cycle your iPhone by holding the side or Sleep/Wake button until you see the Power Off slider. Slide it to turn the iPhone off, then press and hold the side or Sleep/Wake button again until the iPhone restarts.
(Featured image based on an original by Pexels from Pixabay)

by Steve Sorbo | Feb 3, 2020 | Uncategorized
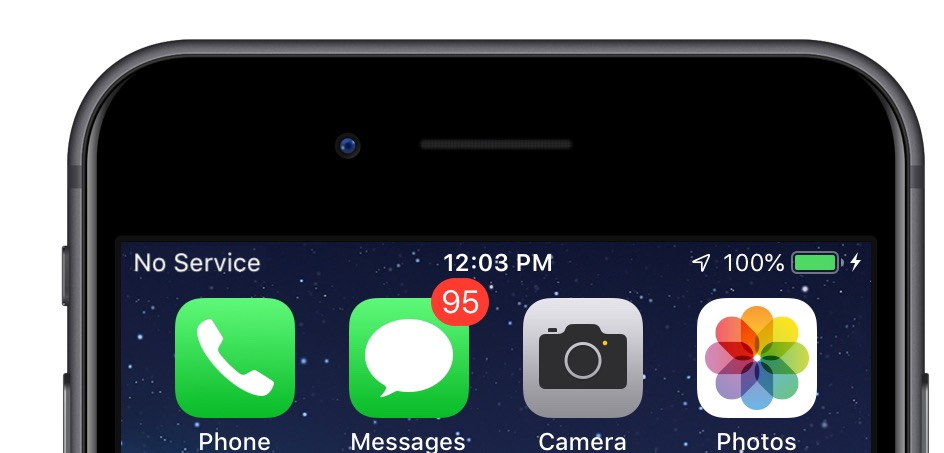
If your Mac is anything like ours, it’s suffering from an infestation of menu bar icons. Sure, the Wi-Fi menu is essential, and many others can be helpful. But if you have too many, or they’re in random order, finding one when you need it can be frustrating. You can employ two techniques to increase the accessibility of your menu bar icons:
- Delete any Apple-provided status icon you don’t use by holding down the Command key and dragging it off the menu bar. (To put it back, select the “Show icon-name status in menu bar” checkbox in the associated System Preference pane.) Command-dragging to delete won’t work for most apps with a menu bar icon; for them, look for a preference in the app itself.
- Rearrange the menu bar icons in an order that makes sense to you by Command-dragging them around. You can’t move the Notification Center icon or put anything to its right, but every other icon is movable.
(Featured image based on an original by Patrick Ward on Unsplash)

by Steve Sorbo | Feb 3, 2020 | Uncategorized
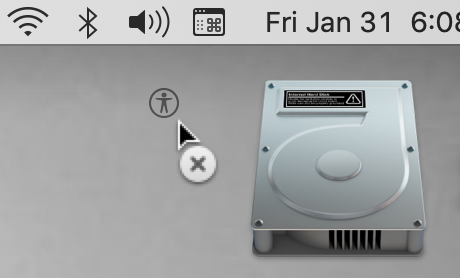
Historically, picking a new Wi-Fi network has required you to open the Settings app and tap Wi-Fi, forcing you to unlock your iPhone or switch away from what you were doing. In iOS 13, however, Apple added a better way to connect to a new Wi-Fi network. Open Control Center (swipe down from the upper-right corner on an iPhone X or later or an iPad; or up from the bottom on an earlier iPhone), press and hold on the network settings card in the upper-left corner to expand it, and then press and hold on the Wi-Fi icon to reveal a list of Wi-Fi networks. Tap one to switch to it.
(Featured image by Paul Hanaoka on Unsplash)

by Steve Sorbo | Feb 3, 2020 | Uncategorized
For some Mac users, macOS 10.15 Catalina is no longer a choice. That’s because the new 16-inch MacBook Pro and the 2019 Mac Pro that Apple released late last year ship with Catalina installed and can’t run any previous version of macOS.
But for most people, it’s time to consider an upgrade to Catalina. Most backup software now works with Catalina’s bifurcated drive approach that puts the system on a separate, read-only volume from your data and apps. We’ve all had several months to come to terms with the fact that old 32-bit apps won’t even launch in Catalina. And Apple has shipped several updates that bring Catalina to version 10.15.3, addressing most of the complaints users had with the initial release.
If you are ready to try Catalina but still want to use 10.14 Mojave, we have some advice for how to make that happen. This could be the case for someone who has purchased a new Mac that does support Mojave but came with Catalina installed, for someone who wants to test Catalina while still using Mojave, or for someone who wants to move on to Catalina but has a 32-bit app that they aren’t ready to say good-bye to.
Downgrade from Catalina to Mojave on Some New Macs
Apple has started installing Catalina on new Macs other than the 16-inch MacBook Pro and 2019 Mac Pro, but since these older Macs can still run Mojave, it’s possible—if a bit tricky—to downgrade them to Mojave.
System engineer Armin Briegel has worked out a way of downgrading new Macs to Mojave. First, you create a Mojave Installer USB drive. To use that drive to boot a Mac with a T2 security chip, you must allow external booting from the Security Utility on the Recovery partition. Once you’ve booted from your Mojave Installer drive, use Disk Utility to erase the entire internal drive. Then install Mojave.
Use Virtualization to Keep 32-bit Apps Running
For some people, what’s keeping them on Mojave is a single 32-bit app that will never be updated in an appropriate fashion. Quicken 2007 falls into this category, as does the ScanSnap Manager app for the ScanSnap S1300, S1500, and S1500M scanners. Sure, you can get a current version of Quicken, but it may not do precisely what you want, and Fujitsu would be happy to sell you a new ScanSnap scanner that does come with 64-bit software, but then you’ll have to figure out what to do with your old scanner.
So if you’re ready to upgrade to Catalina in general but need to maintain access to one or two apps, one solution is virtualization software: either Parallels Desktop or VMware Fusion. Both apps let you run nearly any operating system—including older versions of macOS like Mojave—in a virtual machine. In essence, they fool the guest operating system, whether it’s Mojave or Windows, into thinking it’s running normally on a computer, when it’s actually running in a virtual environment.
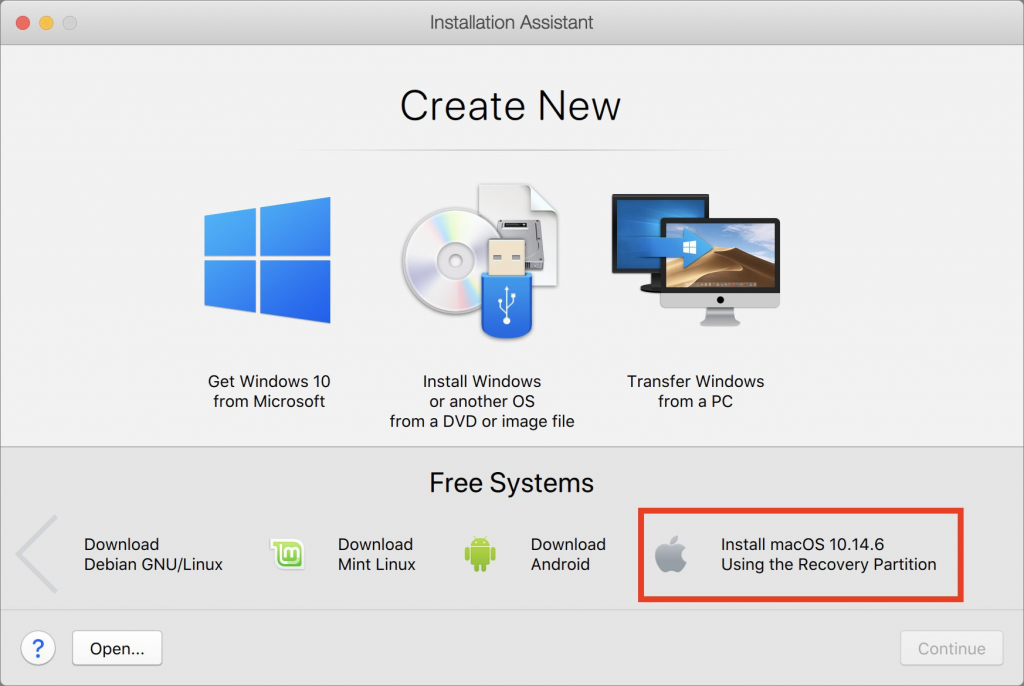
These apps cost about $80, and while there’s a bit of work in setting them up (the screenshot below shows the option for installing Mojave in Parallels Desktop during setup), once you have them configured, it’s easy to run older apps alongside newer ones with little or no performance hit. This approach is also perfect for a 16-inch MacBook Pro or Mac Pro that can’t run Mojave in any other way.
Install Catalina and Mojave on Separate APFS Volumes and Switch Boot
Finally, there’s one other option that lets you switch back and forth between Mojave and Catalina, assuming your Mac supports Mojave. You can create an APFS volume on your internal drive and install another version of macOS on that. It’s easy, and Apple provides full instructions. The only problem with this approach is that you’ll have to restart to switch operating systems, whereas both are available simultaneously with the virtualization solution.
First, make sure you have at least one current backup of your Mac, since it’s foolhardy to adjust your drive structure without one. Next, in Disk Utility, select your internal drive, choose Edit > Add APFS Volume, and click Add. We recommend naming the drive such that it will be clear what’s on it.

Then boot into macOS Recovery and install the desired version of macOS on your new volume. The keys you hold down to get into Recovery determine which version of macOS you’ll get:
- Command-R reinstalls the latest version of macOS that was installed on your Mac.
- Command-Option-R upgrades to the latest version of macOS that’s compatible with your Mac.
- Command-Shift-Option-R reinstalls the version of macOS that came with your Mac, or the closest version still available.
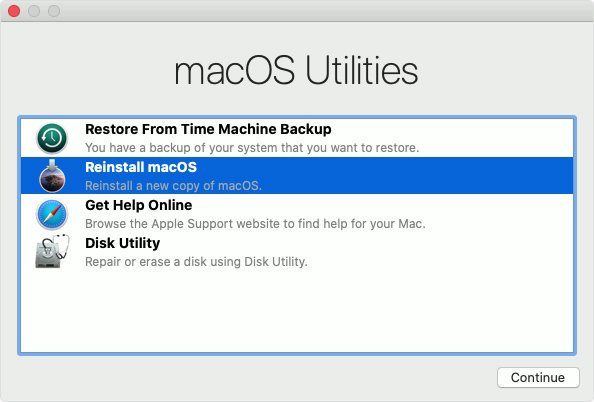
Choose Reinstall macOS from the macOS Utilities window and proceed from there.
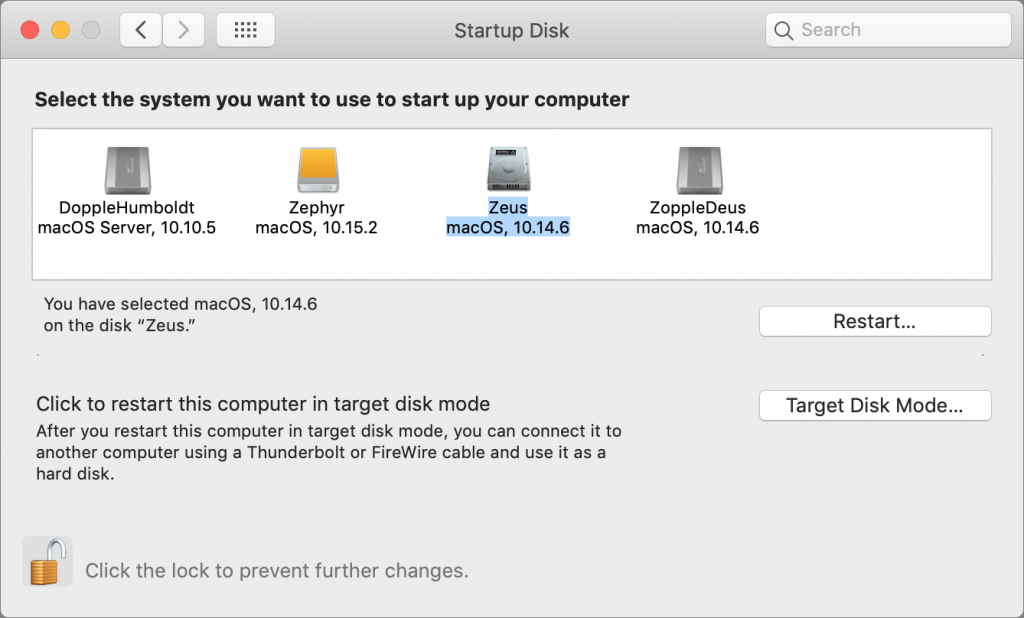
Once the installation is complete, to switch from one version of macOS to another, open System Preferences > Startup Disk, choose the desired volume to boot from, and then click Restart. Or, press Option at startup and select the desired volume from the Startup Manager screen.
Needless to say, the decision about when and how to upgrade to Catalina isn’t a trivial one, so feel free to contact us to discuss your particular situation or to get help with any of the procedures that we’ve described in this article.
(Featured image by Apple)
Social Media: Considering upgrading to Catalina? Or maybe you have a new Mac that came with it already installed? Read on for strategies for downgrading to Mojave or running both Catalina and Mojave.

by Steve Sorbo | Feb 3, 2020 | Uncategorized
Spearfishing. It’s no longer just a tropical ocean sport that could provide seafood for dinner. In today’s tech world, spearfishing is when someone targets you specifically, usually with the goal of taking over your online accounts. Once that’s done, the attacker will try to siphon money from your bank account, impersonate you in an attempt to deceive family or colleagues into sending money, or attempt to ruin your reputation.
You’re probably thinking, “No one would ever target me. I’m not interesting enough.” It is true that the people who should worry the most about spearfishing attacks are high profile or have a high net worth, but modern online criminals aren’t that fussy. In particular, they’re more likely to go after older people. Why older people? Older people tend to be relatively well off and less likely to notice the symptoms of a spearfishing attempt. You should also be concerned if you’re a politician or journalist, have ever been involved in an ugly divorce or legal battle, or can easily think of people who have it in for you.
As we’ve said many times, it’s imperative that you use a secure password manager like 1Password or LastPass to create, store, and enter a strong, unique password for each of your online accounts. Plus, we strongly recommend using two-factor authentication—where you have to enter a one-time code in addition to your password—on all accounts that support it, particularly important ones like your email and banking accounts. But even if you do all that, you may be vulnerable to another tactic favored by spearfishers—the cell phone SIM takeover.
Here’s how it works. Every cell phone, including every iPhone, has inside it a SIM card that gives it a phone number. Swap that SIM into a different phone and it will adopt the SIM card’s number. The problem is that support reps at cellular carriers like AT&T, Sprint, T-Mobile, and Verizon can also move your phone number from one SIM card to another. That makes it possible for you to lose your iPhone, buy a new one, and have your phone number associated with the new one. It also lets you port the phone number to a different carrier, if you wish to switch.
All an attacker has to do is call your cellular provider, pretend to be you, say that they’ve lost their iPhone, and ask to have the number ported to a new device (one they control). It’s likely that the support person will ask a few simple questions to verify your identity, but a clever attacker will likely know your address and be able to learn details like your mother’s maiden name, first-grade teacher’s name, and favorite color, all thanks to Facebook. Criminals can acquire even information like your Social Security number through other data breaches.
Once the attacker controls your cell phone number, they can try to reset the password on various accounts, receiving any verification codes that would normally have been texted to your phone. They’ll probably focus on your email account first because, with control over it, they can reset passwords elsewhere even more easily. And once the attacker has access to your accounts, it’s game over, and you’ll be faced with the difficult and complex task of retaking control and mitigating damage.
How can you protect yourself from such an attack? Whenever possible, it’s better to generate authentication codes with an app such as 1Password, Authy, or LastPass. That removes some of your exposure, but for better or worse, your cell phone number is still the most basic form of identity for many things.
The most important thing to do, then, is to set up an additional PIN or passcode that the carrier will ask for before making any changes to your account. You’ll also have to provide it when logging in to your cellular account online. Such a PIN or passcode is different from a two-factor authentication code that changes continuously—you set your PIN or passcode just like you do for your iPhone or ATM card. And, of course, make sure to store that PIN or passcode in your password manager alongside your other credentials so you don’t forget it.
Learn more about how each of the major carriers supports PINs and passcodes at the links below, and if your carrier isn’t listed, call the company’s support line:
Don’t put this off—if you don’t already have a PIN or passcode on your cellular account, set it up right away.
(Featured image by Gerd Altmann from Pixabay)
Social Media: It’s shockingly easy for someone to take over your cell phone number. Once they’ve done that, they can reset passwords on many of your online accounts. Read on to learn how to protect your cell number with a PIN or passcode.
Recent Comments