
by Steve Sorbo | Oct 3, 2025 | Uncategorized
Although it’s easy to joke about how little we use our iPhones for actual phone calls, telephony remains a core feature that everyone depends on to some degree. In iOS 26, Apple put significant effort into improving the phone experience, delivering the most notable upgrade to the Phone app in years. Here’s what you’ll find.
Unified View
The Phone app has traditionally featured a toolbar with buttons for Favorites, Recents, Contacts, Keypad, and Voicemail, along with a separate Search field. iOS 26 retains this layout as Classic view (below, left) and introduces a new Unified view (below, right) that aims to simplify the interface by reducing the toolbar to four buttons: Calls, Contacts, Keypad, and Search, with the Calls screen combining favorites and recent calls. You can switch between these views by tapping the Filter button in the top-right corner and choosing the preferred layout. The Filter menu also lets you specify which calls appear below, including voicemail.

Call Screening
A new Call Screening feature, configurable in Settings > Apps > Phone > Screen Unknown Callers, intercepts incoming calls from unknown numbers and prompts the caller to “state their name and reason for calling” before the iPhone even rings. If the caller responds, you’ll see a transcript or snippet of their response, allowing you to decide whether to answer or ignore the call. In our experience, it mainly causes spammers and telemarketers to hang up instantly, which is equally effective.

Unknown Call Lists
The Phone app has long been able to silence calls from unknown numbers—those not in your contacts or numbers you haven’t called—and send them directly to voicemail. This feature, now called Unknown Callers, remains available in Settings > Apps > Phone > Call Filtering, as does the previous Silence Junk Callers option, now called Spam. What’s new is that when these options are turned on, lists for Unknown Callers and Spam appear in the Filter menu, so they don’t clutter your Calls list. You can delete calls from unknown callers, mark their numbers as known, or add them to Contacts so they aren’t silenced next time.

Spam Voicemail Reporting
With most spam calls going to voicemail, your inbox may fill up with unwanted messages. You’ve always been able to delete them, but now, when you view a voicemail from an unknown number, a Report Spam button appears. Tap it to report the voicemail to Apple and delete it. We don’t know if reporting spam voicemails will make any difference, but it’s more satisfying than just deleting them.

Hold Assist
The Phone app’s new automatic Hold Assist feature is somewhat hard to test, but we hope it works when you need it. When Hold Assist Detection is enabled in Settings > Apps > Phone, Apple says that if you’re placed on hold by a customer service agent, the Phone app can detect hold music, silence it, and notify you when the agent comes back on the line. You can also manually tap the More button, tap Hold Assist, and then see a transcript of the hold message while you wait. Tap Pick Up when you’re ready to talk.

Live Translation in Calls
If you need to call someone who speaks a different language (as long as it’s English, French, German, Portuguese, or Spanish), the new Live Translation feature might be helpful. Once you’re on the call, tap the More button, then tap Live Translation, and choose the languages for From and To. We highly recommend testing this feature before you actually need it, as it can take a few minutes to download a new language for the first time. After that, tap Start Translation to hear spoken translations and have your voice translated for your caller. You’ll also see a transcript of both sides of the conversation.

Type to Siri During Calls
If you desperately need to use Siri during a phone call, you can now activate Type to Siri. Make sure it’s turned on in Settings > Apple Intelligence & Siri > Talk & Type to Siri, and then double-tap the bottom edge of the iPhone to open a Siri text entry field.

Screen Sharing and SharePlay in Calls
When you’re on a call with someone using iOS 26, iPadOS 26, or macOS 26, you can now initiate Screen Sharing or SharePlay with that person during the call. Access these features from the More button. Screen Sharing can be helpful for explaining how to perform an action on the caller’s device or troubleshoot a problem, and SharePlay lets you and the caller listen to the same audio or watch the same video in a supported app.
Call History
When you view a contact from within the Phone app (not the Contacts app), a Call History option appears, and tapping it shows your call history with that number, which could go back years.

Phone App Comes to macOS, iPadOS, and visionOS
Wait, did we just say you could be on a call with someone using the Phone app on a Mac or iPad? Exactly! With macOS 26, iPadOS 26, and even visionOS 26, the Phone app has expanded to the iPhone’s sibling platforms. It looks and works very similarly, with the benefit of displaying more information at once. To use one of these Phone apps, your iPhone must be on the same Wi-Fi network and signed in to the same Apple Account.

(Featured image based on an original by iStock.com/sergeyryzhov)
Social Media: iOS 26 supercharges the Phone app with call screening, live translation, and hold music detection. But that’s not all! You can make calls from a Mac or iPad, share your screen during calls, see a contact’s call history, and more.
by Steve Sorbo | Oct 3, 2025 | Uncategorized
macOS 26 Tahoe is a larger visual leap than any recent upgrade. Although we don’t yet recommend that everyone upgrade, we want to show you some of the user interface changes that will impact your everyday experience of using the Mac.
Liquid Glass Changes
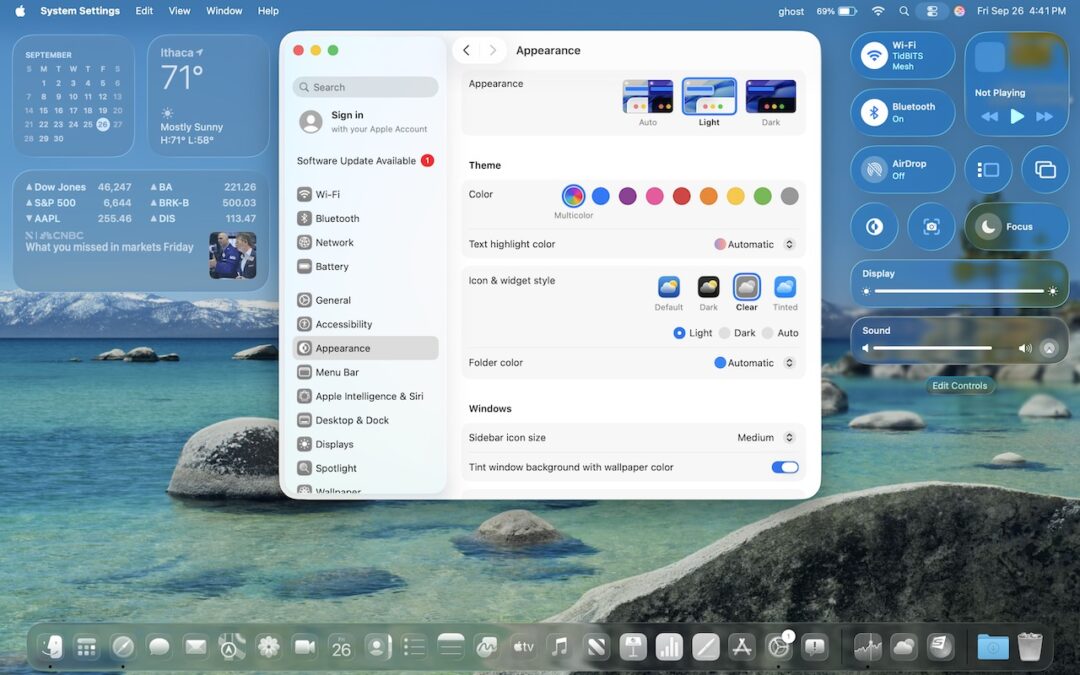
Many of these changes stem from Apple’s new Liquid Glass design language, which we’ve previously covered in more detail. Familiar macOS interface elements with a new Liquid Glass appearance include:
- Rounded corners: You may be surprised by the more rounded corners in many interface elements, including windows. There’s no option to adjust the corner radius.

- Menu bar: Tahoe’s menu bar is now transparent, allowing app windows or desktop wallpapers to show through, which can make it less visually prominent at the top of the screen. To make it opaque, go to System Settings > Accessibility > Display > Reduce Transparency. This setting also affects many other transparent interface elements.

- Icon style: Many developers are updating their icons to conform to Apple’s Liquid Glass guidelines. A more notable change is that users can now switch to dark mode icons, clear icons, or tinted icons in any color. Make these changes in System Settings > Appearance > Icon & Widget Style.

- Widget style: Desktop widgets are now mostly transparent when any window is open on the desktop, and they become solid only when the last window is closed or hidden. You can adjust this setting in System Settings > Desktop & Dock > Dim widgets on desktop. Widgets also adopt the same clear or tinted style used by icons.

- Customized folders: Folders start out blank, but you can Control-click one, choose Customize Folder, and pick an icon (monochrome) or emoji (colored) to brand the folder.

- Sidebars: Although they’re less transparent than other items, sidebars become subtly tinted based on what’s under them. That occasionally results in some awkward overlays, such as in System Settings > Wallpaper, where the thumbnails can scroll underneath the sidebar.

Safari
With Safari, Apple’s Liquid Glass interface causes the toolbar controls and the tab bar at the top to float over the page content underneath. On some sites, this can be distracting or make tab titles hard to read (below, top). If that bothers you, turning on System Settings > Accessibility > Display > Reduce Transparency separates the controls from the content more clearly, but also gives them a gray background (below, bottom).

Control Center
In Tahoe, Control Center not only receives a Liquid Glass makeover but also gains notable new features. Similar to iOS and iPadOS, you can now fully customize the buttons, sliders, and other interface shortcuts in Control Center, removing those you don’t need and adding others. To get started with personalization, click Edit Controls at the bottom of Control Center.

The selection of commands is impressive enough on its own, but Apple also promises that independent developers will be able to offer controls for their apps. Clicking the + button in the menu bar provides the equivalent of additional Control Center pages from iOS: another menu bar icon that displays a different set of Control Center items. You can have as many of these extra Control Center pages as you want.
Lastly, note that you can add many items from Control Center directly to the menu bar, where they can function as toggles or quick access shortcuts.
Spotlight
Apple revamped Spotlight in Tahoe, adjusting its interface (yes, it’s transparent by default, too) and introducing clipboard history. When you activate Spotlight with Command-Space and move the pointer, four buttons appear to filter your search by apps, files, shortcut actions, and clipboard history—Command-1 through 4 serve the same purpose.

Previously, Spotlight separated different result types vertically; now you can click buttons just below the search box to filter results by category. Spotlight also remembers past searches, allowing you to use the arrow keys to browse backward and forward through your search history.
Spotlight’s new Apps view, which gets its own icon on the Dock, also replaces the longstanding but little-used Launchpad. If you want a full-screen grid of app icons, similar to Launchpad, consider Launchie, AppHub, or AppGrid Launcher.

Terminal
Although many people never open the Terminal app, which gives access to the Unix command line hidden in macOS, Apple has finally updated it to allow for more customization. Fortunately, Terminal still features completely opaque windows—transparency won’t make reading command-line output any easier. Each profile offers various customization options beyond appearance, so those who frequently use Terminal can tailor it to their preferences.

While we don’t want to downplay the impact these visual changes may have on your Mac experience, we’ve also found they’re easy to get used to or turn off. After using Tahoe for a few weeks, most of these changes will become the new normal. Apple will undoubtedly continue to polish Liquid Glass over the next year, refining its smoothness and eliminating awkward bits.
(Featured image by Apple)
Social Media: From transparent menu bars to customized folders, macOS 26 Tahoe introduces the most significant visual update in years. Discover the key interface changes that will influence your daily Mac use… and which you can turn off.
by Steve Sorbo | Oct 3, 2025 | Uncategorized
The “visual intelligence” aspect of Apple Intelligence leverages the artificial intelligence capabilities of your iPhone to make what you see through the iPhone’s camera or on its screen interactive and actionable in ways that weren’t previously possible. It’s one of the most useful aspects of Apple Intelligence.
Triggering Visual Intelligence
We offer numerous examples of visual intelligence’s superpowers later in this article, but first, let’s make sure you know how to activate its two modes: camera mode and screenshot mode. Use camera mode to learn more about the world around you; use screenshot mode for help with something on your iPhone’s screen. Here’s how to trigger each mode:
- Camera mode: Press and hold the Camera Control button on all iPhone 16 models (except the iPhone 16e), all iPhone 17 models, and the iPhone Air. Press the Camera Control again or tap the shutter button to lock the image for visual intelligence. On the iPhone 15 Pro, iPhone 15 Pro Max, and iPhone 16e, which support Apple Intelligence but lack the Camera Control, use the Action button, a Lock Screen button, or a Control Center button.
- Screenshot mode: Simultaneously press the side button and volume up button to display an interactive preview of what was on the screen.
Visual intelligence analyzes the content of your image and provides relevant action buttons based on what it detects. While the Ask and Search options are always available, other buttons appear contextually depending on the content.
- Ask: Tapping the Ask button lets you pose a question about the image to ChatGPT. (But we’ve found that Apple won’t pass on health-related questions or queries with certain types of sensitive data.)
- Search: Tapping the search button conducts a Google Image search for similar items. It may also display tabs for search results from other apps, such as Etsy or eBay.
- Recognized objects: When visual intelligence identifies an object, such as a specific plant or animal, it displays a button that brings up more details.
- Text: When it detects blocks of text, visual intelligence provides buttons to summarize the text, read it aloud, or translate it.
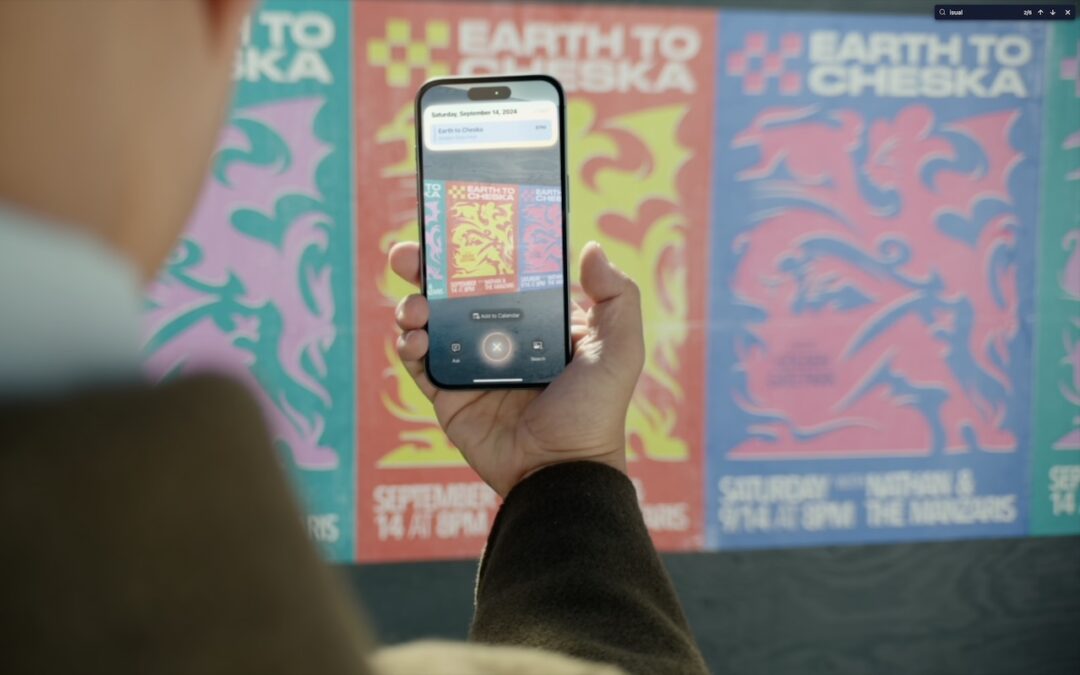
- Dates: If it detects a date in text, visual intelligence displays an Add to Calendar button.
- Contact info: When details like email addresses or phone numbers appear in the image, visual intelligence can help you call or message the number, or send email.
- Addresses: When it identifies a physical address in text, visual intelligence displays a button that opens the address in Maps.
- URLs: This works in the virtual world as well—a URL embedded in an image prompts visual intelligence to display a button that opens the website in Safari.
- Businesses and locations: When you capture an image of a business or other location that’s known in Maps, visual intelligence can show hours, menus, reviews, and more.
Real-World Uses for Visual Intelligence
It can be challenging to think of uses for visual intelligence at first, simply because it’s a new way of engaging with the world around you and what you see on your iPhone. We’re used to taking pictures of event flyers we want to attend, doing Google searches for things we see, asking questions of chatbots, and using specialized apps to identify plants and animals—visual intelligence can do all that and more. Here are a few practical ways to use visual intelligence today:
- Create calendar events: Create calendar events from posters, flyers, invitations, or Web pages. When you point the camera at a poster or take a screenshot of an event page, an Add to Calendar button allows you to create an event directly from the on-screen details.

- Find business information: Point the camera at a business to retrieve details such as hours, menu/services, phone number, and website. It’s the same information you’ll find in Maps, but it’s easier to pull up using visual intelligence.

- Search for products: Shopping for something? Once you find an example of what you like—such as this mid-century modern sofa—take a screenshot, circle the picture with your finger, and browse the search results for similar items.

- Summarize and read text aloud: When you’re faced with a large amount of text, especially if the font size is difficult to read, visual intelligence can provide a summary or even read it aloud. The option to have text read aloud can be particularly helpful for those with low vision.

- Translate text: iOS offers multiple ways to translate text in unfamiliar languages, including the Translate app, but visual intelligence is often the fastest way to get a quick translation of a sign or placard.

- Quick object identification: We’ve all wondered what some plant or animal is—using visual intelligence, you can point your camera at it to find out quickly. Just tap the name that appears to get more details.

- Research questions: Sometimes, you know what you’re looking at but have questions about it. Instead of starting a new search, you can use visual intelligence, tap the Ask button, and pose your question to ChatGPT. Tap the response to ask a follow-up question. If you connect Apple Intelligence to your ChatGPT account in Settings > Apple Intelligence & Siri > ChatGPT, your conversations will be saved in ChatGPT, where you can review and continue the discussion.

- Manipulate real-world data: Anything that can be photographed or captured in a screenshot can be used as data for other manipulations. For example, you could take a picture of a bookshelf and ask for a list of all the titles, or take a screenshot of a recipe and request the calorie count per serving.


How does visual intelligence compare to apps like ChatGPT, Claude, Gemini, and others? It outdoes them in two ways but falls short in one. Thanks to its deep integration with iOS and the iPhone’s Camera Control, it’s easier to activate visual intelligence than any other app. It also transfers data more effectively to other apps, such as sending URLs to Safari, phone numbers to Phone or Messages, addresses to Maps, and more. However, chatbot apps—which can also analyze photos and screenshots—are more conversational, offer more detailed information, and are willing to discuss potentially sensitive topics that Apple won’t touch, such as health and politics. We use visual intelligence for straightforward tasks, but for more complex situations, we often turn to a chatbot app instead.
(Featured image by Apple)
Social Media: With its visual intelligence feature, Apple Intelligence brings superpowers to your iPhone’s camera and screen. Just point and hold to identify objects, translate text, create calendar events, and get answers about anything you see.
by Steve Sorbo | Oct 3, 2025 | Uncategorized
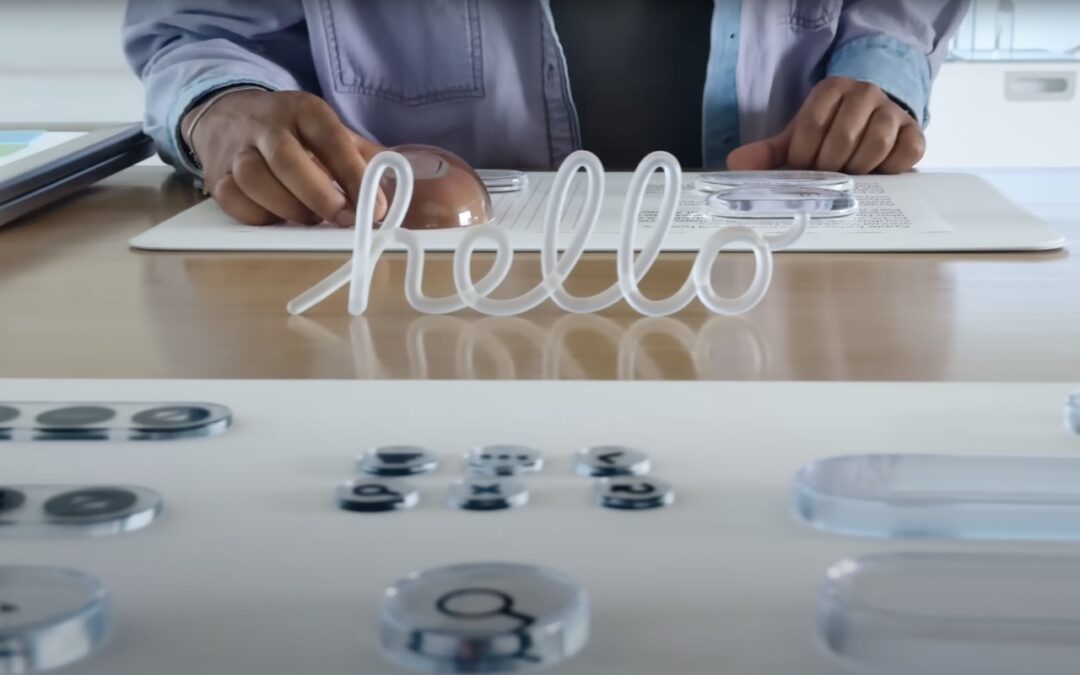
If you’ve been following Apple’s recent product releases, you’ve probably heard the term “Liquid Glass.” That’s what Apple calls its newest design language, a combination of an aesthetic look and functional philosophy for the user interface in iOS 26, iPadOS 26, and macOS 26 Tahoe, in particular, but also in watchOS 26, visionOS 26, and tvOS 26 (we think of them collectively as OS 26). Apple describes Liquid Glass as a “translucent material that reflects and refracts its surroundings, while dynamically transforming to help bring greater focus to content.” The company claims that Liquid Glass “makes apps and system experiences more expressive and delightful while being instantly familiar.” Apple even has an intro video.
Beyond the marketing speak, that means most of the controls you’ll interact with in Apple’s new operating system will be semi-transparent and appear to float above the content, blurring what’s underneath and adjusting to the underlying content’s color. That may make it easier for you to focus on your content, or it may make the interface harder to read. Liquid Glass also features subtle animations that may seem fun or make everything feel a little squishy.
Like many of Apple’s interface changes over the years, Liquid Glass has sparked strong reactions—some love it, while others dislike it. While we’ll explore the pros and cons below, it’s worth acknowledging upfront that Liquid Glass represents Apple’s vision for the future of its interfaces. Although you can adjust various settings to make it more comfortable to use (which we’ll cover shortly), Liquid Glass will be part of all Apple operating systems going forward. The good news is that, as with previous major interface changes, such as Aqua in Mac OS X and iOS 7, we’ll all adapt to it over time as Apple continues to refine and enhance the experience.
Liquid Glass Pros
Although Liquid Glass might appear to be just a fashionable cosmetic update, Apple’s designers had some serious objectives:
- Cross-device platform consistency: Many Apple users own an iPhone, iPad, Mac, Apple Watch, and Apple TV. The interfaces for these operating systems have all evolved somewhat independently due to differences in their development, usage, and screen sizes. Liquid Glass is Apple’s effort to unify the design language across its devices, making each device feel like part of a cohesive design philosophy.

- Focus on content: Between the translucent look that refracts the content behind it and by having interface elements morph and fade when not in use, Apple designed Liquid Glass to help you focus on your content rather than cluttering the screen with controls.
- Modern look and feel: While longtime Apple users may prioritize functionality and familiarity, one of Apple’s main goals is to attract new users by convincing them to switch from Android and Windows or encouraging them to start with Apple devices. Liquid Glass draws inspiration from futuristic devices seen in science fiction shows and movies, which might especially appeal to younger users who have grown up with these visual references.
- Fluid animations: By adding subtle animations to Liquid Glass, Apple makes the interface come alive in a way that wouldn’t be possible otherwise. Again, that may attract new users or impress possible switchers.
- Personalization: Some people have a strong aesthetic desire to see their interfaces be clear or tinted rather than have every icon in its own bold color. With Liquid Glass, you can customize your icons, widgets, and folders to work better in dark mode, be clear, or have any tint you prefer.
- Technical showcase: Liquid Glass’s complex real-time blurring and lighting effects require a significant amount of processing power, but Apple’s A-series and M-series chips are up to the task. This is another case of competitive advantage—Apple is showing off by saying, “Our devices have so much power that we can use it to make the interface snazzy looking.”
Liquid Glass Cons
Just because Apple describes Liquid Glass as “delightful” doesn’t mean everyone will agree. Many users dislike change, and numerous user experience experts have criticized aspects of Liquid Glass. Some of the concerns include:
- Readability: When Liquid Glass displays light gray text on a clear control positioned over a dark background with additional text, it becomes almost unreadable. While this is an extreme case, many floating translucent controls over backgrounds can cause legibility issues, especially for those whose vision isn’t perfect. As you can see in this screenshot of iOS 26’s release notes (below, left), the Liquid Glass controls in Photos are notably awkward (below, right).

- Learning curve: Apple can say that the interface changes in Liquid Glass are for the better, but there’s no denying that everyone will need to learn something new. That’s easier for some users than others, and many people will be boggled by controls moving around.
- Matter of taste: Not everyone shares Apple’s design aesthetics. Some people find Liquid Glass to be cartoonish or distracting.
- Inconsistent design: While Liquid Glass aims to create a uniform design language across all Apple platforms, it will take time for even Apple to update everything. Some third-party apps will never receive updates, and some developers may refuse to modify their interfaces to support Liquid Glass. We’ll be dealing with inconsistent interfaces for several years.
- Performance issues: On some older devices, Liquid Glass may feel sluggish or drain the battery more quickly due to heavy GPU usage. Although Apple doesn’t intend to create a bad user experience for anyone, performance issues may nudge some people to upgrade sooner than they planned.
Liquid Glass to Solid Metal
You can’t turn off Liquid Glass, but three Accessibility settings will make it less liquid and less glassy on the iPhone, iPad, and Mac. There are also a few additional settings that may make the iPhone and iPad easier to use. All these settings are independent, so you can mix and match to find the combination that gives you the look you prefer. (Paths are for the iPhone and iPad; on the Mac, start with System Settings and note slight naming differences.)
- Reduce Transparency: Turning on Settings > Accessibility > Display & Text Size > Reduce Transparency significantly improves Liquid Glass readability by making translucent panels opaque, adding solid backgrounds, and reducing blur. On the Mac, this setting restores the solid menu bar. However, Reduce Transparency may make certain aspects of the interface look awkward, such as when a previously transparent toolbar suddenly covers a much larger part of the screen.
- Increase Contrast: Enabling Settings > Accessibility > Display & Text Size > Increase Contrast makes interface elements stand out more by sharpening borders and reducing the tendency for controls to meld with the background. Keep in mind that Increase Contrast can also significantly alter the colors of many interface elements.

- Reduce Motion: If Liquid Glass’s animations, blurring, and parallax effects make you a little queasy, turn on Settings > Accessibility > Motion > Reduce Motion. While you’re here, turn on Prefer Cross-Fade Transitions to minimize motion for interface controls that slide in and out. A warning—without transitions, some parts of the iPhone and iPad experience might seem abrupt.
The next three settings are exclusive to the iPhone and iPad, and you’ll find them in Settings > Accessibility > Display & Text Size:
- Bold Text: Flipping this switch makes all interface text bold, which can make it much easier to read, particularly when transparency renders thin glyphs nearly invisible.
- Button Shapes: It’s harder to find controls that benefit from turning Button Shapes on, but if you want a true button instead of blue text or underlines that show a label is clickable, turn this on.
- On/Off Labels: Turning this setting on displays small | and O labels for On and Off on all switches to help clarify if the change from gray (Off) to colored (On) isn’t clear.

Again, Liquid Glass is the foreseeable future of Apple interface design, and while it’s far from perfect right now, we anticipate Apple improving and refining it over the next few releases. You can help nudge that process in the direction you want by submitting feedback to Apple.
(Featured image by Apple)
Social Media: Apple’s new Liquid Glass interface brings semi-transparent, floating controls to all your devices. Here’s what that means and how to customize it to optimize your experience.

Recent Comments