by Steve Sorbo | Sep 3, 2024 | TCN Content
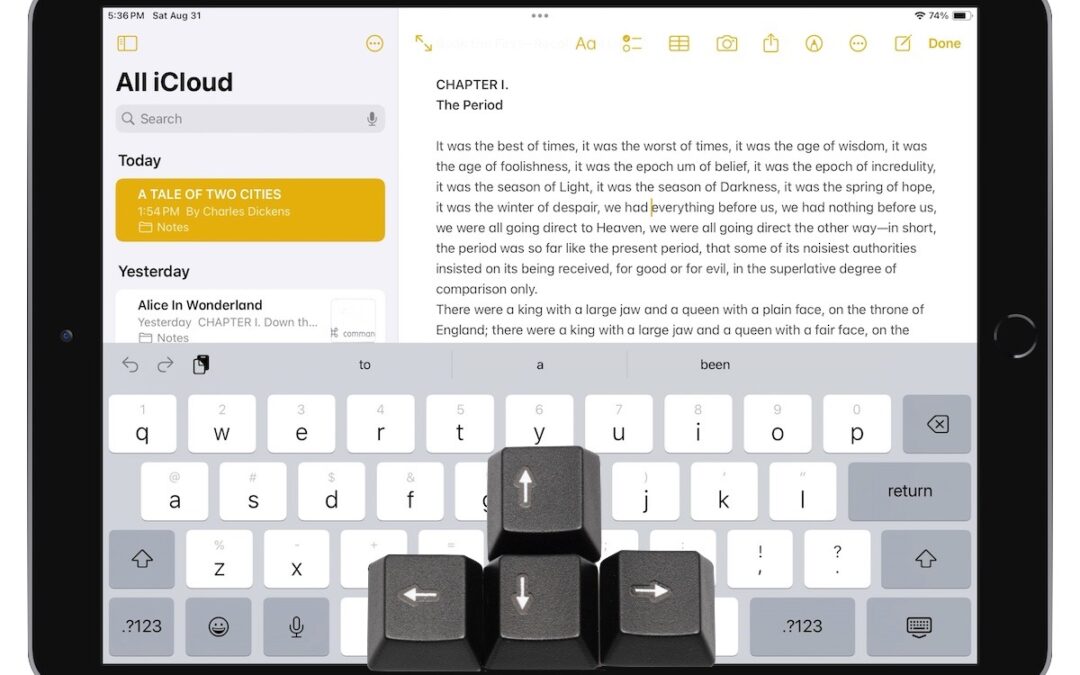
A friend recently expressed astonishment when she saw us using trackpad mode while editing text on an iPhone. (It works on the iPad, too!) So, even if you already know these tips, do your friends a favor and show them:
- Tap once to position the insertion point at the start or end of a word.
- Touch and hold to reveal the magnifier and move the insertion point within words ➊.
- Touch and hold the Space bar to turn the entire keyboard into a virtual trackpad that lets you move the insertion point above ➋. On the iPad, you can also touch and hold with two fingers anywhere on the keyboard.
- Double-tap to select a word; keep dragging to select more text, one word at a time ➌.
- Triple-tap to select an entire paragraph.

(Featured image by Adam Engst with keys from MXW Photo)
Social Media: Editing text on an iPhone or iPad will never be as easy as on a Mac, but with these tips, you can quickly position the insertion point and select words and paragraphs using your finger.

by Steve Sorbo | Sep 3, 2024 | TCN Content
Although paying attention to online security is of primary importance, don’t forget local security. You don’t want to go out for lunch and let someone wandering by your office poke through your email, messages, photos, and private files. To ensure this doesn’t happen, set your Mac to start the screen saver or sleep the display after a few minutes (on a laptop, just close the lid), and then set “Require password after screen saver begins or display is turned off” to a short duration. We recommend 1 or 5 minutes, though you can adjust to balance inconvenience against security. To eliminate the fuss almost entirely, use Touch ID or an Apple Watch to unlock your Mac without having to type your password.

(Featured image based on an original by iStock.com/Armastas)
Social Media: Don’t forget about local security on your Mac. Make sure to require a password shortly after the screen saver starts or the display sleeps to prevent people from riffling through your email, photos, messages, and more.
by Steve Sorbo | Sep 3, 2024 | Uncategorized
We’ve written in the past about how Apple-only companies can protect themselves from ransomware (strong security, isolated backups, monitoring software), but realistically, it’s primarily a threat to computers running Windows and Linux. If you, or anyone you know, is targeted by ransomware, look to the No More Ransom website, developed by Europol’s European Cybercrime Centre and the Dutch police, for advice and tools. The advice boils down to: “Don’t pay the ransom because it proves to the criminals that ransomware works, and there’s no guarantee it will solve your problem.” On the tools side, the Crypto Sheriff helps identify the type of ransomware in play, and No More Ransom provides decryption tools for 180 different forms and variants of ransomware. There are no guarantees, but anyone who has fallen prey to ransomware should start with No More Ransom.

(Featured image based on original by iStock.com/Suebsiri)
Social Media: Ransomware primarily affects Windows and Linux computers, but if you, or anyone you know, falls prey to it, visit the No More Ransom website for advice and decryption tools.
by Steve Sorbo | Sep 3, 2024 | Uncategorized
Are you planning to upgrade to a new iPhone 16? It’s exciting, we know, but it’s best to proceed deliberately when setting up your new iPhone to avoid causing yourself headaches. Follow these instructions when you’re ready to transfer your data—and, for many people, much of your digital life—to the new iPhone. Apple also has a series of videos you can watch.
- Update your old iPhone to the latest version of iOS. If you have an Apple Watch, update it to the latest version of watchOS. This process can take some time, so it may be best done overnight before you move data to your new iPhone.
- Make sure you know your Apple ID and password, and if you have an Apple Watch, its passcode. You will likely have to enter them at least once during this process.
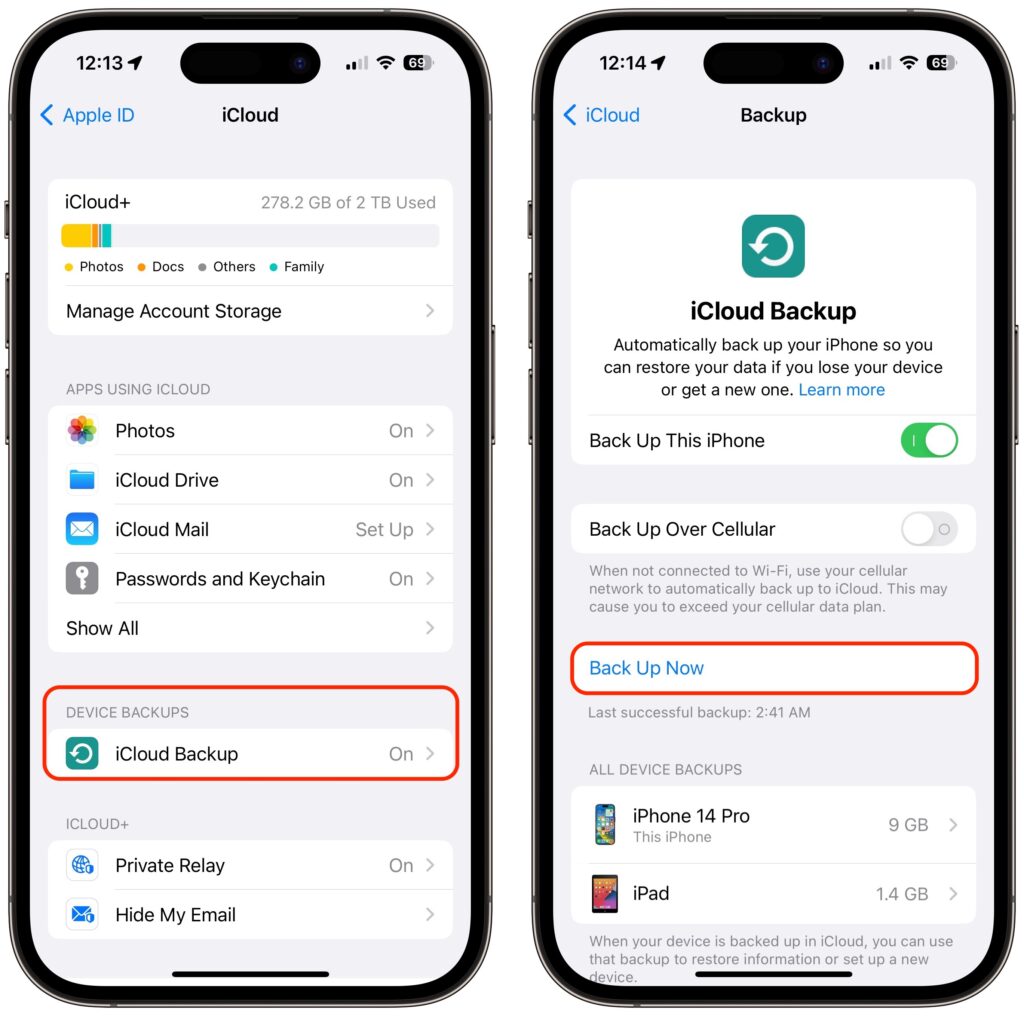
- Back up your old iPhone to iCloud or your Mac. (If you back up to a Mac, be sure to encrypt the backup, or else it won’t include saved passwords, Wi-Fi settings, browsing history, Health data, and call history.) Or back up to both, for safety’s sake. We prefer iCloud backups because they’re easier and don’t introduce additional variables, like flaky USB cables. If you don’t usually back up to iCloud, Apple will give you temporary iCloud storage to make a backup when moving to a new iPhone. To initiate an iCloud backup, go to Settings > Your Name > iCloud > iCloud Backup and tap Back Up Now.
- If you have an Apple Watch, you don’t need to unpair it from your old iPhone at this point in the process. (Later, if the automatic transfer has not worked, you can unpair it manually and pair it again later. If you end up taking the manual route and have a cellular Apple Watch, you’ll be asked if you want to keep or remove your plan. If you’re keeping your Apple Watch to re-pair with your new iPhone, keep the plan.)
- You shouldn’t need to worry about transferring a SIM card. If you ordered your new iPhone through Apple and connected to your cellular carrier account during purchase, activating the new iPhone should cause it to take over your phone number. The same should be true if you’ve purchased directly through your carrier. Besides, it’s likely that iPhone 16 models sold in the US will rely on eSIM and lack SIM trays like the iPhone 15, so only non-US users might need to transfer the SIM card from the old iPhone to the new one. Even then, it’s better to contact your carrier and get them to activate the new SIM in the new iPhone because old SIMs don’t always support all current cellular features, such as full 5G support.
- Transfer your data, settings, apps, and purchased content in one of these three ways. None of them will be quick, despite the first one’s name, so initiate the transfer only when you have plenty of time:
- Quick Start: With the Quick Start feature, content from your old iPhone copies directly from your old iPhone to your new one. We recommend this technique because it’s more likely to preserve app logins, something that’s less true when restoring from an iCloud backup. Put your iPhones next to each other (plugged into power), use the old iPhone to scan the animation on the new one, and then follow the rest of the steps.
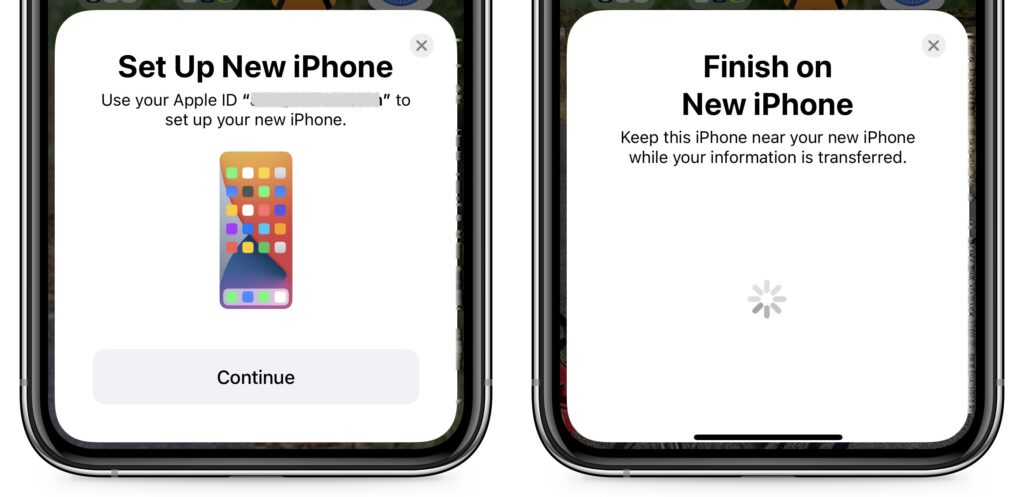
- iCloud: With this technique, the new iPhone will download your content from your old iPhone’s iCloud backup. Once you’ve joined a Wi-Fi network on the new iPhone and tapped the Restore from iCloud Backup button, you’ll have to select the correct backup—likely the most recent one you just made. Keep your new iPhone plugged into power the entire time to ensure that all your content syncs during this step.
- Finder or iTunes: With this approach, you’ll restore your old iPhone’s content from a backup made to your Mac. Connect your new iPhone to your Mac using an appropriate cable, open a Finder window (or iTunes on an old Mac), select your device in the left-hand sidebar, click Restore Backup, and choose the appropriate backup—likely the most recent one.
- Perform post-transfer tasks. Ensure that you can make and receive a phone call. If necessary, pair your Apple Watch with the new iPhone. You’ll also need to pair your Bluetooth accessories—including AirPods—with your new iPhone. Plus, some app data needs to sync to your new iPhone, so open the Mail, Contacts, and Calendar apps and check if they have your data. It could take a few minutes for them to fill up. Apps may request notification permissions again, and you may need to download content and in-app purchases.
- If you use two-factor authentication with an app like 1Password, Authy, or Google Authenticator, ensure you can get your 2FA codes using your new iPhone. 1Password and Authy are good about providing access to 2FA codes from multiple devices—just log in to your account from each device—but Google Authenticator may require some additional setup since it didn’t initially offer any way to transfer codes to a new phone.
- Finally, if necessary, set up single sign-on for work or school. If your workplace or school uses a security system like Duo, you’ll likely want to activate your new iPhone and deactivate the old one. Using any device, navigate to a standard single sign-in login screen from your organization, look for a link for managing your logins, click that link, and follow the prompts.
Although Apple works hard to make the process of transferring from an old iPhone to a new one as painless as possible, some things may fail to transfer seamlessly. For that reason, we strongly recommend holding onto your old iPhone for a week or so to ensure the new one can do everything the old one could. During that time, put the new iPhone through its paces with an eye toward checking every app you need.
(Featured image by iStock.com/valiantsin suprunovich)
Social Media: It’s exciting to get a new iPhone, but take a few minutes to read our advice on what you need to do before—and after—transferring your data from your old iPhone.
by Steve Sorbo | Sep 3, 2024 | Uncategorized
A few months ago, news broke about the latest massive data breach, this time from a company called National Public Data, a company that collects vast amounts of personal data about individuals from public data sources, including addresses, employment history, criminal records, and Social Security numbers. NPD then sells access to that data to employers conducting background checks, landlords screening potential tenants, banks verifying loan information, and more.
Unfortunately, NPD’s data security was lax, with the company publishing its own passwords in a file that was freely available from its homepage. How many people are affected remains unclear, though it seems likely to be hundreds of millions, if not the three billion reported by some outlets. Precisely what is included in the breach varies by person, but it includes names, physical addresses, phone numbers, dates of birth, and Social Security numbers for many. Email addresses may be included as well.
Put bluntly, this is terrible. It’s bad enough when a firm to which you’ve entrusted your data suffers a breach, but no one affected by the NPD breach had a relationship with the company. NPD was just hoovering up everything it could find and reselling it. NPD is far from alone in this field—numerous other companies do the same thing, and some of them have also suffered data breaches.
What can you do? Honestly, not much. Your data appeared in the breach through no fault of your own, so apart from generally trying to keep the amount of your personal data available online to a minimum (watch social media in particular), nothing you do will make a big difference.
You might be tempted by services that promise to “scrub the Internet!” of your data at people-search sites, but a Consumer Reports study found that they were largely ineffective, working for only about a third of the profiles tested. (The study was admittedly fairly small.) The best of the services was effective less than 70% of the time, and manually opting out at each site was slightly more effective. Plus, the study only looked at sites that offer opt-out options—with companies like NPD, there’s no way to know if they have your data or will remove it if asked.
However, several sites will now tell you if your data was included in the NPD breach, including npdbreach.com and npd.pentester.com. Keep in mind that both come from companies that also offer data removal services, although neither were included in the Consumer Reports study.

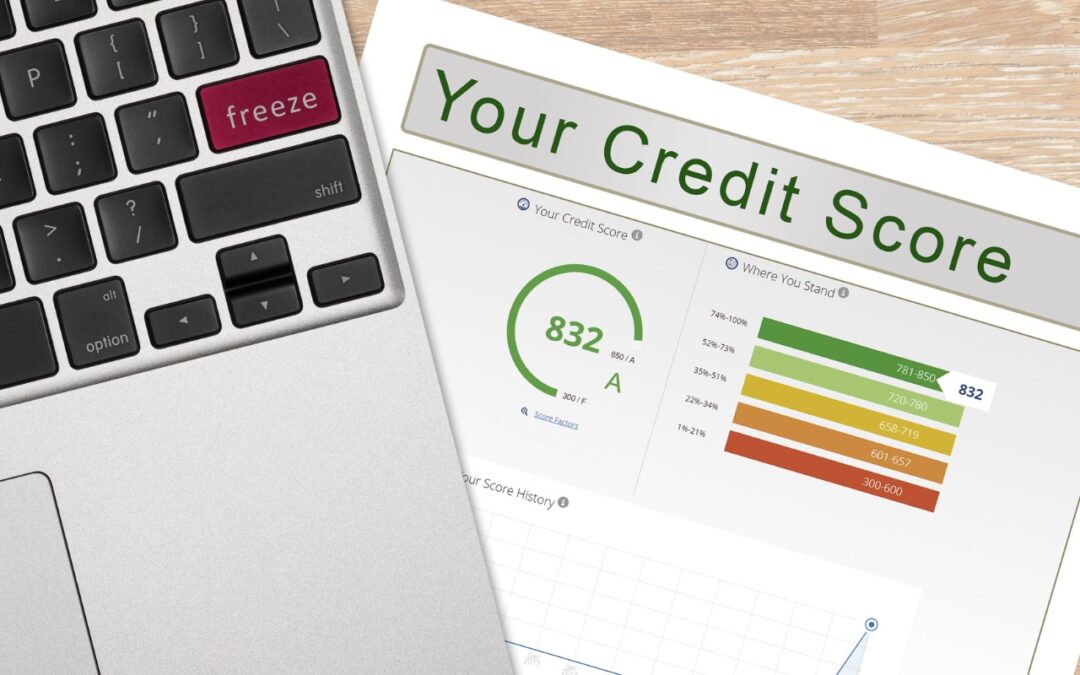
Breached companies will often offer free credit monitoring services to affected customers. That’s highly unlikely to happen with NPD because it has no business relationship with the people whose data it lost. But there’s a better approach anyway: placing a freeze on your credit reports. Doing so is free and prevents an identity thief from opening new financial accounts in your name by blocking access to your credit file from prospective creditors. Freezing your credit report has no impact on your credit score.
However, before you freeze your credit reports, check them to ensure they’re accurate. You can get free weekly credit reports from all three credit bureaus at AnnualCreditReport.com, authorized by the federal government, which also offers other useful information about protecting yourself from identity theft. If you discover any mistakes, work with the credit bureau to resolve them.

Once you’ve checked your credit reports, you can freeze them, which you need to do with each of the three credit bureaus:
Security freezes remain in place indefinitely, and many people can leave them that way. However, you’ll need to remove the freeze temporarily if you plan to rent a new apartment or house, take out a loan, apply for a credit card, set up a new mobile phone plan or utility account, apply for a new job, or undergo a background check. All three services provide such a capability online, or you can contact them via phone or postal mail, as mentioned above. It can be hard to think about removing a freeze proactively, so if something that might involve checking your credit score fails unexpectedly, remember the freezes. You might even make an annual reminder in your calendar so you don’t go too long without remembering.
It’s a shame that data breaches have become a fact of life, but that’s unavoidable without significantly stronger privacy regulations that prevent large companies from unnecessarily storing personal data and punishing them when they don’t protect it effectively.
(Featured image by iStock.com/BackyardProduction)
Social Media: Hundreds of millions of people had their names, addresses, and Social Security numbers revealed in the massive NPD breach. There isn’t much you can do to protect yourself, but we explain the one thing everyone should do.

Recent Comments