by Steve Sorbo | Aug 1, 2024 | Uncategorized
In the Apple world, the account that controls access to all your Apple-related online services is the Apple ID. Buying apps from the App Store, putting photos in iCloud Photos, and sharing data between iCloud-enabled apps—all these actions rely on your Apple ID. If you’re a regular Apple user, you have an Apple ID associated with your email address.
Most Apple users set up an Apple ID when they configure their first Apple device, and if you don’t have an email address that you want to use, you can create a free @icloud.com address during the process. (If you need to create a new Apple ID, you can do that at appleid.apple.com.)

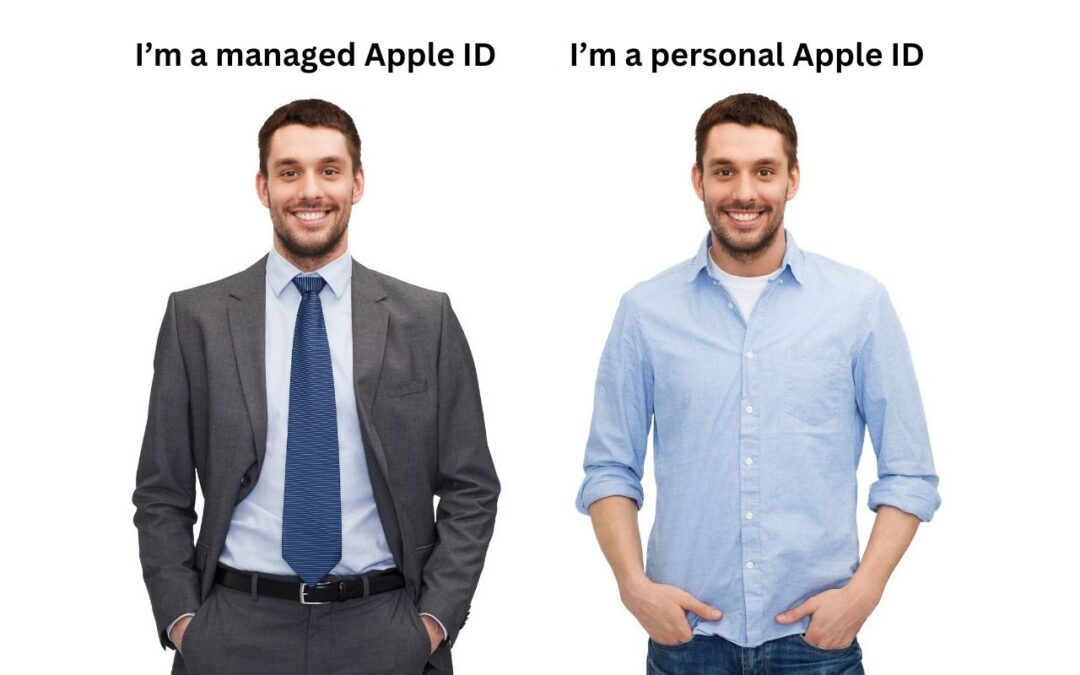
There are actually two types of Apple IDs: personal Apple IDs used by individual users and managed Apple IDs given to employees by businesses and other organizations. Managed Apple IDs are popular with companies that give devices to staff members and need to ensure compliance with various usage and security policies. Let’s look at how they differ:
- Creation, ownership, and control: Individuals set up personal Apple IDs on their own and maintain full ownership over the account and control over the device. Managed Apple IDs are set up by the organization, typically through Apple Business Manager, and the organization retains ownership and control for centralized management. That control is essential when an employee leaves. Otherwise, a company may be unable to reset a returned device and give it to another employee.
- Access to Apple services: Personal Apple IDs have full access to all Apple services and features. Managed Apple IDs have much more limited access to protect the organization from unauthorized purchases and insecure behavior. Users with managed Apple IDs can’t purchase anything from the App Store, iTunes Store, or Apple Books. Nor can they access Apple Arcade, Apple Fitness+, Apple Music, Apple Music radio, Apple News+, or Apple TV+. The Find My, Health, Home, Journal, and Wallet apps aren’t available or fully functional. Plus, Apple Pay, iCloud Family Sharing, iCloud Mail, and iCloud+ services like Private Relay, Hide My Email, and custom email domains are unavailable.
- Security and management: When a device relies on a personal Apple ID, that user is responsible for maintaining security and managing apps (which will belong to the user). That’s appropriate for individuals, but for companies that need to protect corporate information, managed Apple IDs allow the IT department to enhance security by requiring passcodes, enforcing password policies, setting role-based permissions, and separating work and personal data. On the management side, managed Apple IDs make it easier to reset devices, revoke access, comply with legal and privacy regulations, integrate with corporate identity systems, and centralize app licensing.
Though some organizations may prevent it, it is technically possible to use both types of Apple IDs on the same device. For instance, you could use a managed Apple ID on an employer-provided device along with a personal ID to access the App Store, Apple Music, Apple News+, and other Apple services. To do that on an iPhone, you’d go to Settings > Your Name > Media & Purchases and either sign in with your personal Apple ID or, if necessary, tap Sign Out and sign back in.
What’s the takeaway? There are three possibilities, depending on who owns the device and the employer’s security and management policies:
- Personal device not used for work: If you’re a regular user who has purchased your own device and you either don’t use it for work or your employer doesn’t care what you do, all you need is a single personal Apple ID. Although it’s possible to create multiple Apple IDs and use them for different purposes, it’s a recipe for confusion down the road.
- Personal device used for work: If your employer has a BYOD (Bring Your Own Device) program that lets you use your own device with corporate resources, they will likely ask to use Apple’s User Enrollment to create a profile on the device that separates personal and work data and allows the use of both personal and managed Apple IDs. Although the IT department cannot access your personal data (emails, messages, photos, location, etc.), it can enforce security policies, install and configure work-related apps, and control corporate data on the device. Some people find the privacy implications of this approach troubling and opt for separate work and personal devices.
- Employer-provided device: If your employer provides a device for your use, they will likely require you to use a managed Apple ID on it. That prevents you from having to worry about security or management, but comes with some restrictions on what you can do. Talk to your IT department if you also want to use your personal Apple ID on the device.
Hopefully, we’ve clarified the situation surrounding personal and managed Apple IDs. Which makes the most sense in any given situation depends on a wide range of variables, so contact us if you need to talk through the possibilities as either an employee or employer.
(Featured image based on an original by iStock.com/dolgachov)
Social Media: There are actually two types of Apple IDs: personal and managed. Regular users have personal Apple IDs; those who use employer-provided devices are often required to use managed Apple IDs. Learn more about both.

by Steve Sorbo | Aug 1, 2024 | Uncategorized
Under the hood, macOS relies on Unix, which is a multi-user operating system. That’s why a Mac can host multiple users who, as long as they don’t know each other’s passwords, cannot see each other’s files. To maintain each user’s privacy, macOS relies on permissions that specify who can do what with any given file or folder. For the most part, permissions work how they’re supposed to, letting you work with all your files and keep any other users on the Mac out of your stuff.
Where things can get tricky is with external drives. In some situations, permissions can prevent you from accessing files written to an external drive on one Mac from another Mac. That happens because the first admin user account created on a Mac is given the UniqueID of 501, regardless of its name. (Because, Unix.) If you create additional accounts, they get UniqueIDs of 502, 503, and so on. Again, the names are irrelevant; all that matters is the UniqueID.
If you write files to an external drive while logged into the 501 admin account on one Mac but then try to access those files from an account with any other UniqueID on that Mac or any other, macOS won’t let you. No 503 account, for instance, can access a 501 account’s files.
There are tweaky Unix solutions to this problem, but Apple realized this would be an issue from the early days of Mac OS X and provided a single-click solution: the “Ignore ownership on this volume” checkbox. When selected, it tells macOS to pay no attention to permissions for all the files and folders on a drive, regardless of what that might mean.
To access this setting, select the drive in the Finder, choose File > Get Info, and expand the Sharing & Permissions section at the bottom. Before you can select the checkbox, click the lock icon and enter your admin password when prompted.

There are three scenarios where enabling “Ignore ownership on this volume” is helpful:
- Multi-user access: Imagine that you share a Mac with family members or colleagues. You want to keep your email and text message conversations private but need to share numerous other large files stored on an external drive. (For just a few files, use the Shared folder alongside your user folders.) By enabling “Ignore ownership,” you can be certain that all users of the Mac can do whatever they need to with those files.
- Access from multiple Macs: Suppose you have a portable SSD containing video files you want to display from any Mac. Perhaps they’re canned business presentations or home videos. Since you cannot know what the UniqueID of the current account on any given Mac will be, selecting “Ignore ownership” will ensure that you can open your videos regardless.
- Juggling user accounts: Although it’s a bad idea to do this willy-nilly, some people regularly create and delete accounts for their own use. Since all the accounts are used by a single person, they don’t think about permissions as an issue, but macOS does unless they select “Ignore ownership.”
In general, when using an external drive to move files between accounts, people, or Macs, select “Ignore ownership” to prevent pesky permissions problems.
But that doesn’t mean you should turn on “Ignore ownership” in every situation. There are some situations where enabling the setting would be inappropriate because it’s essential to preserve permissions:
- Boot drives: macOS itself relies on specific permissions and won’t even show the checkbox for boot drives. If you’re planning to install macOS on an external drive and use it to boot a Mac (Apple provides instructions), make sure not to select “Ignore ownership” before starting.

- Time Machine drives: Time Machine cares deeply about maintaining correct permissions, so you should not enable “Ignore ownership” on a drive that you plan to use with Time Machine. After Time Machine starts backing up to a drive, the “Ignore ownership” checkbox disappears.

- Bootable duplicates and other backups: Similarly, if you’re using Carbon Copy Cloner or SuperDuper to create a bootable duplicate of your boot drive, “Ignore ownership” must be unchecked. Retrospect also warns users to turn off “Ignore ownership” on backup and restore drives to ensure that permissions are preserved. Other backup apps likely have similar requirements.
One last thought. If you run into permissions-related problems reading files from an external drive, it’s worth enabling “Ignore ownership” to see if that resolves your issues. If it doesn’t, or if the problems keep cropping up in different contexts, contact us.
(Featured image based on an original by iStock.com/Rawpixel)
Social Media: Permissions are an essential aspect of the Unix underpinnings in macOS, but on some external drives, they can be problematic. Learn when you should and should not enable “Ignore ownership on this volume.”

by Steve Sorbo | Aug 1, 2024 | Uncategorized
A side effect of the pandemic is that online videoconferencing improved drastically. Video calls happened before 2020, but videoconferencing wasn’t an everyday activity for most people. Now, with many people working remotely or in a hybrid model, it’s a fact of business life. To support videoconferencing tools, Apple has extended macOS’s basic webcam and microphone capabilities to allow Mac-powered video calls to go beyond the basics. Apple’s enhancements fall into four categories: camera modes and controls, mic modes, reactions, and Presenter Overlay.
Camera Modes and Controls
Apple’s most important additions rely on machine learning to enhance your image or the background. Because of the significant camera and CPU requirements for these features, they require specific setups. All work with any Mac using a sufficiently recent iPhone (excluding the iPhone SE) with Continuity Camera, but several also work with a Mac’s camera.
Here’s what you can do in macOS 14 Sonoma (these features are also available in macOS 13 Ventura’s Control Center, under Video Effects). To access the controls for these features, click the Video  menu in the menu bar—it appears whenever the camera is active, but not before. Click each feature to turn it on (green) or off (gray), and each has additional settings you can reveal by clicking the > to the right.

- Center Stage: Use Center Stage to stay centered in the frame as you move around during the call—it’s great for those who work at standing desks and dislike standing still, but be careful if you leave room clutter near the edge of your camera’s view, because it may be revealed as you move. You can choose between the iPhone’s Main and Ultra Wide cameras; experiment to see which you prefer. It requires an iPhone 11 or later over Continuity Camera or a Mac with Apple silicon using an Apple Studio Display.
- Portrait: Rather than replace the background like many apps allow, Portrait blurs the background to keep the focus on you. Its slider lets you control the blur level. It works with an iPhone XR or later via Continuity Camera and on Macs with Apple silicon using a built-in webcam or Apple Studio Display. (Zoom and other apps add a Background item to the Video menu as well; Portrait blurs virtual backgrounds, too.)
- Studio Light: If your room has poor lighting, Studio Light can improve your appearance by dimming the background and illuminating your face. Move the slider to adjust the lighting to your liking. Its Continuity Camera requirements specify an iPhone 12 or later, or a Mac with Apple silicon using its built-in webcam or an Apple Studio Display.
- Desk View: This mode leverages the Ultra Wide camera of the iPhone 12 or later via Continuity Camera to display both your desk and your face simultaneously, which could help show off physical sketches or other objects. It launches a separate Desk View app and requires additional setup beyond what we can document here. Set aside some time to become familiar with it before attempting to use it in a call.
- Manual controls: If you’re not using Center Stage, you can zoom, pan, and recenter your face in the frame. Move your pointer over the video preview, after which you can drag the zoom control left or right, drag your image within the frame to pan, and click Recenter to reset any zooming and panning changes you’ve made. These controls require an iPhone XR or later via Continuity Camera, or any Mac connected to an Apple Studio Display.
Mic Modes
Apple also uses machine learning to enhance your audio, providing spatial audio and two special modes: voice isolation and wide spectrum. To switch between these modes, click Mic Mode in the Video menu or the Audio  menu in the menu bar—the latter appears if a running app only does audio and the microphone is active. (Again, these are available for Ventura users under Mic Mode in Control Center.) Here’s what they offer:

- Voice isolation: Use this option to focus on your voice and reduce background sounds in your environment. It’s a good choice for standard video calls.
- Wide spectrum: This option captures your voice and the sounds in the environment around you. Choose it if you want the other parties to hear music being played or other ambient sounds.
- Spatial audio: For multi-person calls, spatial audio makes the voices you hear sound like they’re coming from where each person is positioned on the screen. It doesn’t appear alongside the others; we assume it’s included in Standard mode. It requires wired headphones, a Mac laptop using its internal speakers, or an Apple silicon Mac using AirPods.
Reactions
While Apple’s camera and mic modes are generally useful, many people have issues with the Reactions feature, which fills your frame with a 3D effect when you make the associated hand gesture. The problem is that you can inadvertently make such a gesture when it would be highly inappropriate. Imagine filling the screen with balloons while you’re on an important call with a client’s CEO or, if you’re a therapist, accidentally shooting off fireworks while talking through sensitive issues with a patient. Reactions include hearts, balloons, thumbs up, thumbs down, rain, confetti, fireworks, and lasers.

You can turn off the Reactions feature entirely in the Video menu, and we recommend doing so unless all your video calls are informal and light-hearted. When it’s off, you can manually trigger a reaction by clicking its icon in the Video menu.
As with other video-related features, the Reactions feature requires a Mac with Apple silicon or a Mac using Continuity Camera with an iPhone 12 or later.
Presenter Overlay
One problem with sharing your screen while videoconferencing is that the audience no longer sees you. That’s appropriate when everyone should focus on the shared screen, but in other situations, the audience may tune out if they can’t see you. Apple designed Presenter Overlay to combat that problem—it merges your image with the screen you’re sharing. The Large option puts your shared screen behind you, like a news presenter, whereas the Small option shows your face in a movable bubble, so you stay on screen without obscuring much content.

To start using Presenter Overlay, start sharing your screen using the screen-sharing feature of the videoconferencing app you’re using. Then click the Screen Sharing  menu in the menu bar, expand the Presenter Overlay section if necessary, and select Large or Small. The video preview shows what your audience sees. (Presenter Overlay has been somewhat flaky in our testing for reasons we don’t understand. If the controls don’t show up, try switching cameras or restarting screen sharing.)
In Large mode, you can move the shared screen to your other side by moving your pointer over the video preview and clicking the button with opposing arrows. In Small mode, you can move your bubble (it’s on your main screen, not the preview window) by dragging it to the desired position.
If you fell into specific videoconferencing habits in the early days of the pandemic, take a few minutes to explore the options that Apple now makes available for improving your video, audio, and presentations. And turn off the Reactions feature if you don’t want to be surprised by an accidental gesture triggering an effect at a potentially awkward time.
(Featured image by Adam Engst)
Social Media: Although videoconferencing has become a part of everyday life for lots of us, many people don’t realize that macOS provides helpful options for improving our video, audio, and presentations.

by Steve Sorbo | Aug 1, 2024 | Uncategorized
Apple’s prices for Thunderbolt, USB-C, and Lightning cables often seem unnecessarily high. $69 for a Thunderbolt 4 cable or $19 for a simple USB-C to Lightning cable? Unfortunately, when it comes to cables, you often get what you pay for. Happily, other reputable hardware manufacturers like Anker, Belkin, and OWC sell quality cables for less than Apple. When possible, get cables with braided covers, which tend to last longer because the braided design makes them less prone to kinks, less likely to tangle, and more resistant to abrasion.
Stay away from bargain-priced cables from no-name Chinese manufacturers, and if you see a supposedly genuine Apple cable selling for a too-good-to-be-true price, consider the possibility that it’s counterfeit. Apple created a detailed page that explains how to identify counterfeit or uncertified Lightning accessories.

Why spend more on cables? Inexpensive cables are likely to wear out sooner, but the main concern is that many modern cables carry power along with data. A short circuit could result in hardware damage and, in extreme cases, could generate sparks, smoke, or even fire. While fires are extremely unusual, it’s easy to find reports online.
When it comes to damaging hardware, USB-C is much less of a problem than a decade ago, thanks to Google engineer Benson Leung. After a bad USB-C cable fried his Chromebook, he embarked on a one-man crusade to identify good and bad USB-C cables. Due in part to his efforts, Amazon started prohibiting listings of USB-C cables and adapters that weren’t compliant with the USB-C specs. You may still encounter bad cables Amazon hasn’t identified or dodgy cables sold through other retailers, but the danger is lower than it used to be, particularly with cables from name brands.
Although Apple has now standardized on USB-C cables for charging, Lightning cables remain common for older iPhones and iPads. Both are readily available in gas stations and drugstores, but you’ll do best if you stick with cables from brand-name companies. They cost more, but do you trust a cable sold next to tabloids and Twinkies? It will probably work in a pinch if you need to fill in for a lost or forgotten cable on a trip, but don’t rely on it afterward.
Even the best cables will fail if you mistreat them. Follow this advice to ensure a long life for heavily used cables:
- Don’t create sharp bends in the cable, especially near the connector. Sharp bends can eventually break the insulation and reveal the wires inside. Even before that, if the wires get too close, they can heat up and melt the insulation.
- When unplugging your device, pull from the plug instead of farther down on the cord to avoid stress on the connection point.

- When coiling your cables, avoid wrapping them tightly around something that’s not round. A tight wrap can cause kinks that degrade the wires inside.
- Don’t put heavy objects on cables or sandwich them between a desk and the wall. Anything that compresses the cable can cause damage.
- iPhones are fairly water resistant, but try to keep the charging port and cable plug clean and away from liquids. Pocket crud or a droplet in the wrong place could cause a short circuit. Because of their metal jackets, USB-C cables are less susceptible than Lightning to such problems, but it’s still worth being careful.
- If a cable’s insulation ever breaks so you can see the wires inside, discard it immediately. It’s always worth maintaining a collection of a few cables of every type you use so you can replace damaged cables right away.

In the end, the advice is simple. Spend a little more on quality products from reputable manufacturers so you don’t have to worry about a $3 non-compliant USB-C cable damaging your pricey iPhone or worse. What’s worse? Your house burning down.
(Featured image by Adam Engst)
Social Media: It’s tempting to buy cheap USB-C and Lightning cables, but non-compliant, counterfeit, and defective cables can damage your hardware or even cause fires. Read on for more about keeping your cables working in the long run.

by Steve Sorbo | Jul 1, 2024 | Uncategorized
We Apple users tend to believe that our devices usually last longer—both physically and functionally—than Windows PCs and Android smartphones. For instance, Apple’s current operating systems work on nearly all Macs, iPhones, and iPads introduced in 2018 and later, albeit with some feature loss on the oldest devices. In a white paper entitled “Longevity, by Design,” Apple has now outlined how it works to increase product longevity through design and manufacturing, ongoing software support, and access to repair services. The white paper may be partially aimed at dissuading elected officials from passing Right to Repair legislation that could force unwanted design changes, but it still offers an illuminating look at how the company balances environmental impact, protecting customer privacy and safety, and enabling repair transparency. It’s worth a read if you’re interested in why Apple makes the design decisions it does.

(Featured image based on an original by Apple)
Social Media: Apple has published a white paper that offers an illuminating look at how the company works to increase device longevity while balancing environmental impact, protecting customer privacy and safety, and enabling transparency in repair.

Recent Comments